Run PyCharm IDE over SSH using Remote Host Interpreter
2. The purpose of this tutorial is to provide help to those who have problems with VM's screen size or the installed IDE and want to have a full IDE to work with.
3. This workaround is completely optional and does not affect your ability to do the labs, however, it might make it easier.
Getting Started
VM Network Configuration
There are possible configurations for the VM within VirtualBox, namely “Bridge” and “NAT” mode. NAT is the simplest way of accessing an external network from a virtual machine. We set the network adaptor mode to NAT and configure Port Forwarding in order to get access to the VM from the host.
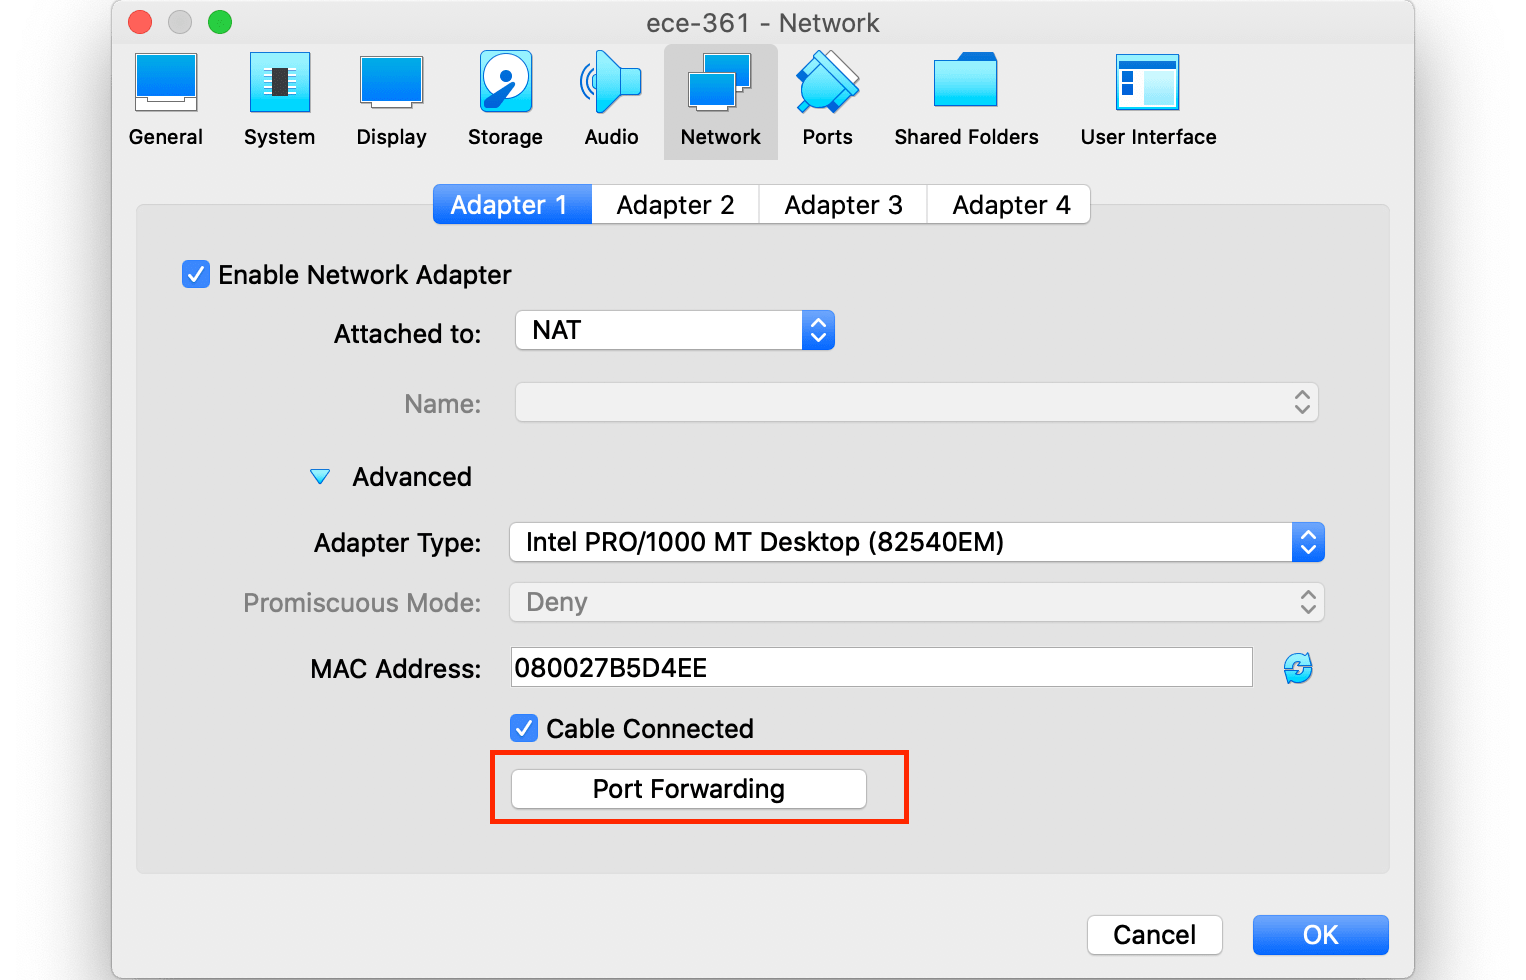
Go to the Network and then select NAT in “Attached to” and click on Port Forwarding:
In the following step we forward all queries sent to the port 2229 of the Host to the port 22 of the VM which is the default port for SSH. The port number 2229 can be any arbitrary available port in the host. Add a new entry and enter the number 2229 for Host Port and number 22 for the Guest Port. Leave everything else and click on Ok.
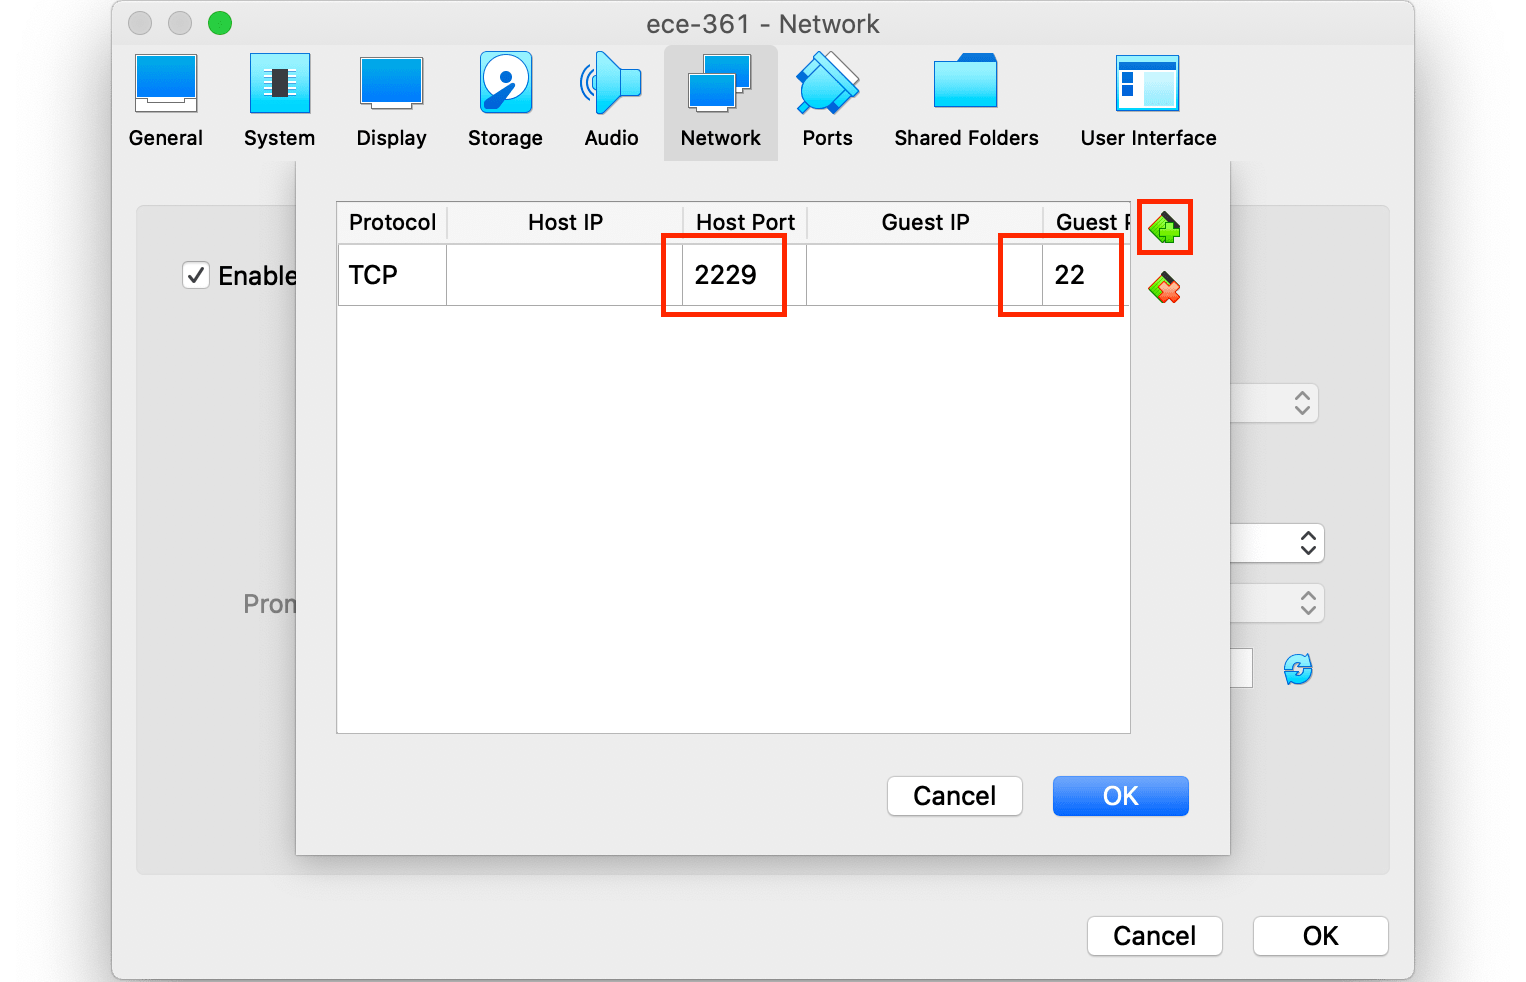
Then start the VM and you are done with VM’s network configuration!
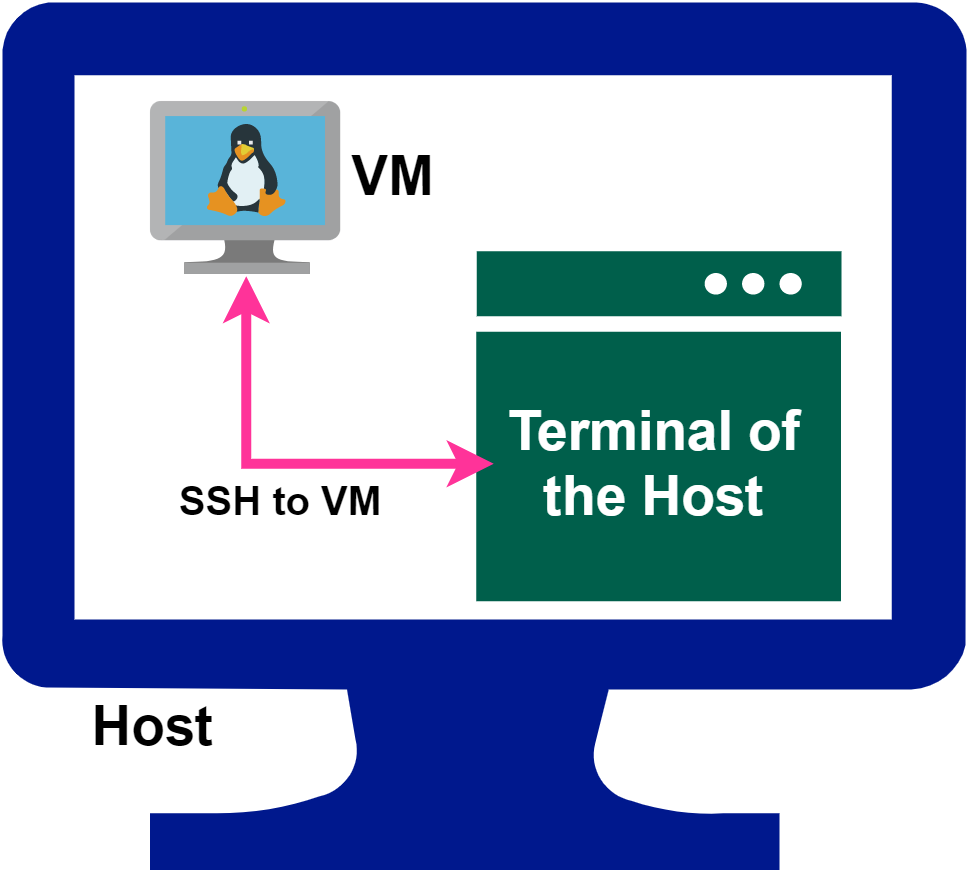
Connect to the VM from the Host (your computer)
Now you are able to open your terminal and connect to the VM from your machine (host). Thus, minimize the VM (you do not have to work with the VM’s actual window anymore!) and continue using SSH.
Now open a new terminal (either your Linux/MacOS terminal or putty) and connect to the VM:
# In MacOS/Linux terminal you can enter:
ssh ubuntu@localhost -p 2229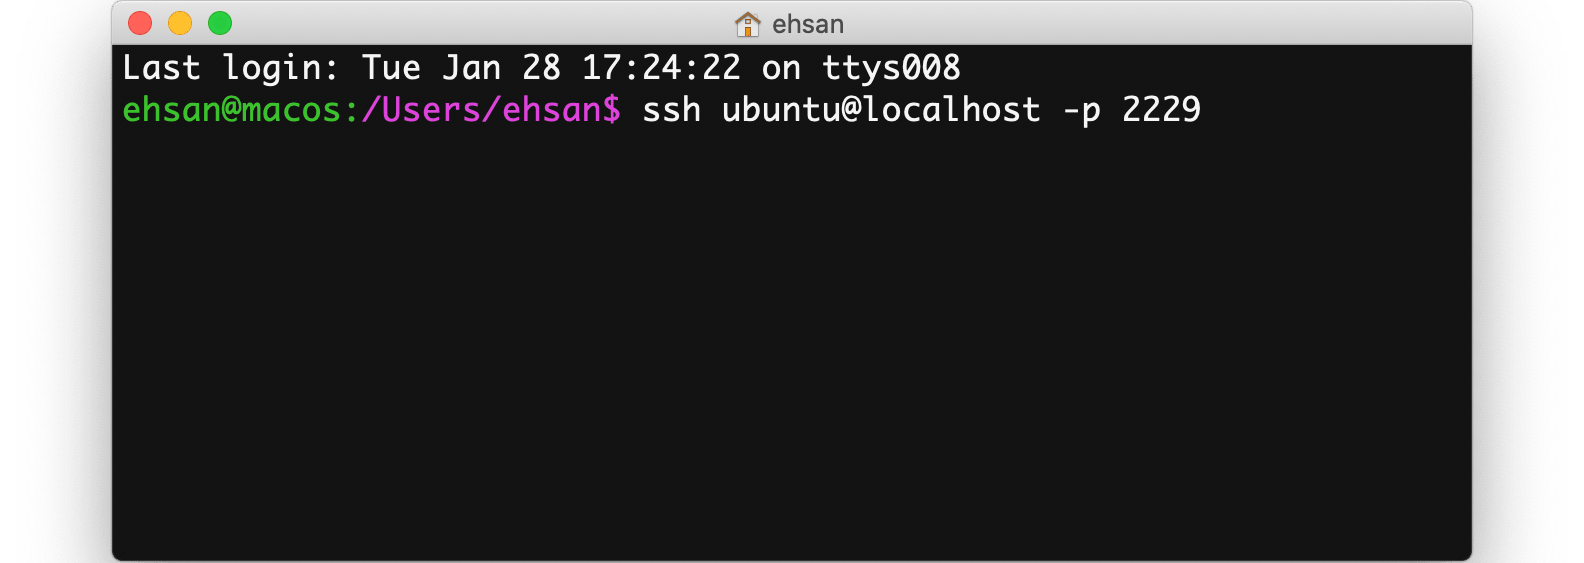
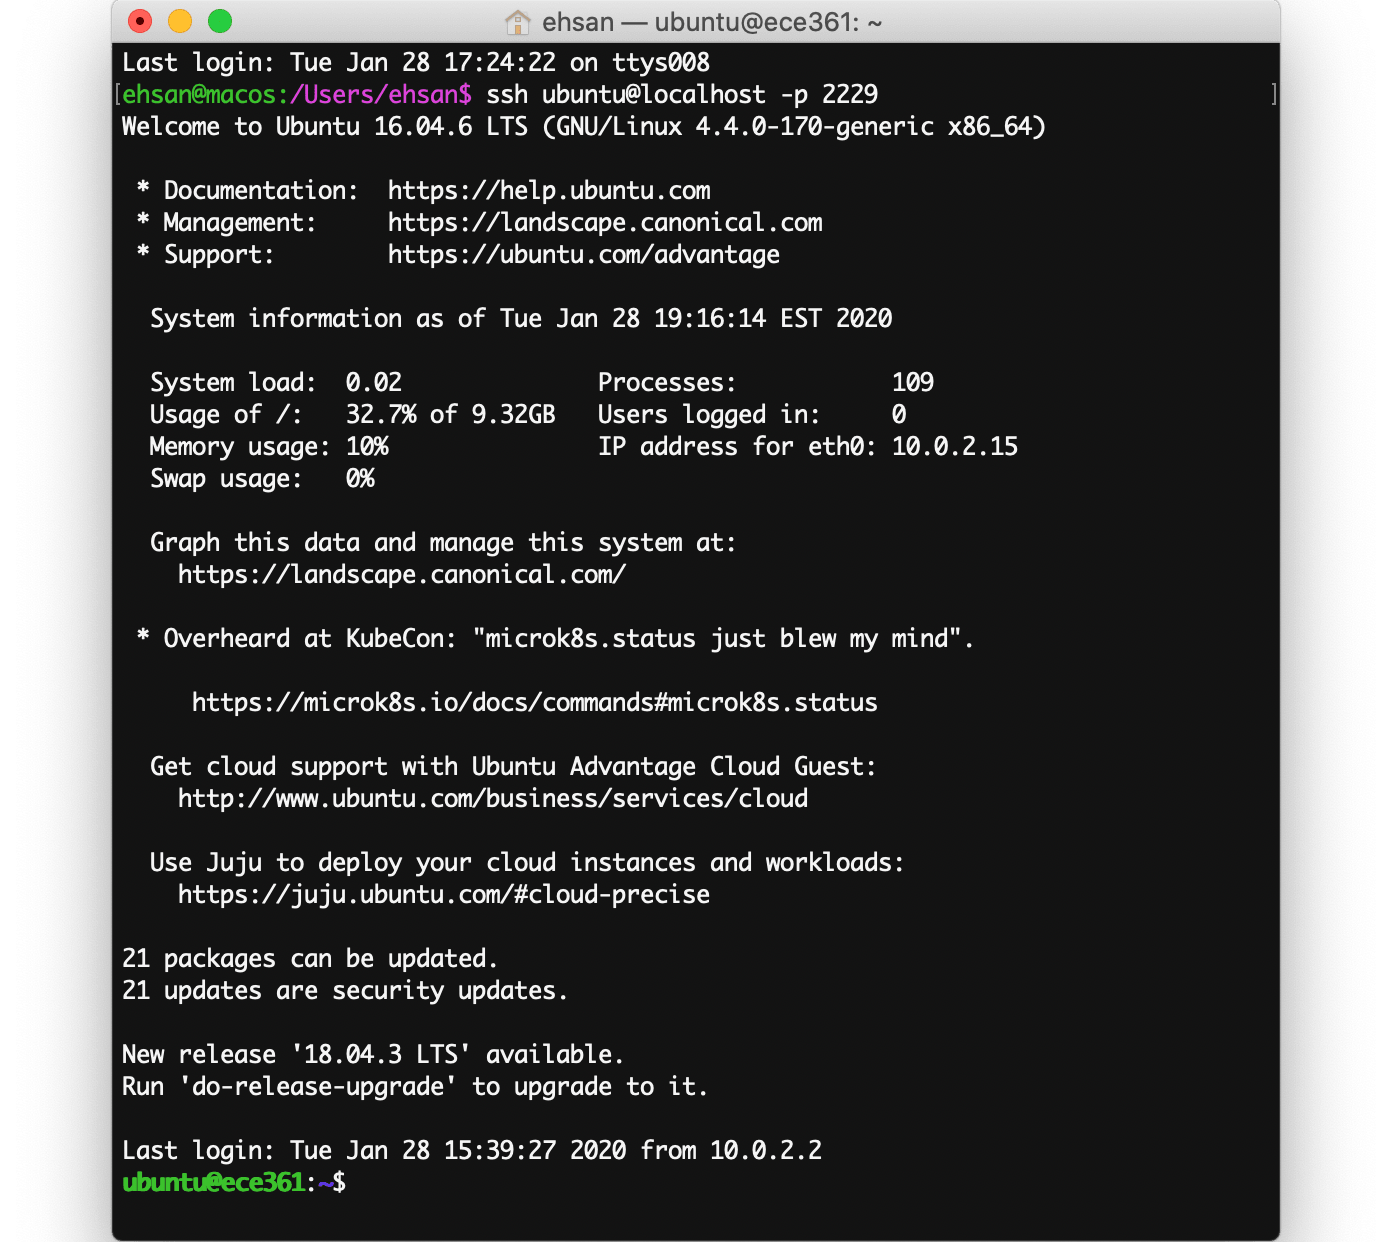
Then it prompts for the password, after entering the password you will log into the VM. Now you can open as many terminals as you need and as long as you have made an SSH connection (like fig. 5) then you can think of each of them as a VM terminal. Every command you enter is executed in the VM.
Using PyCharm over SSH Connection
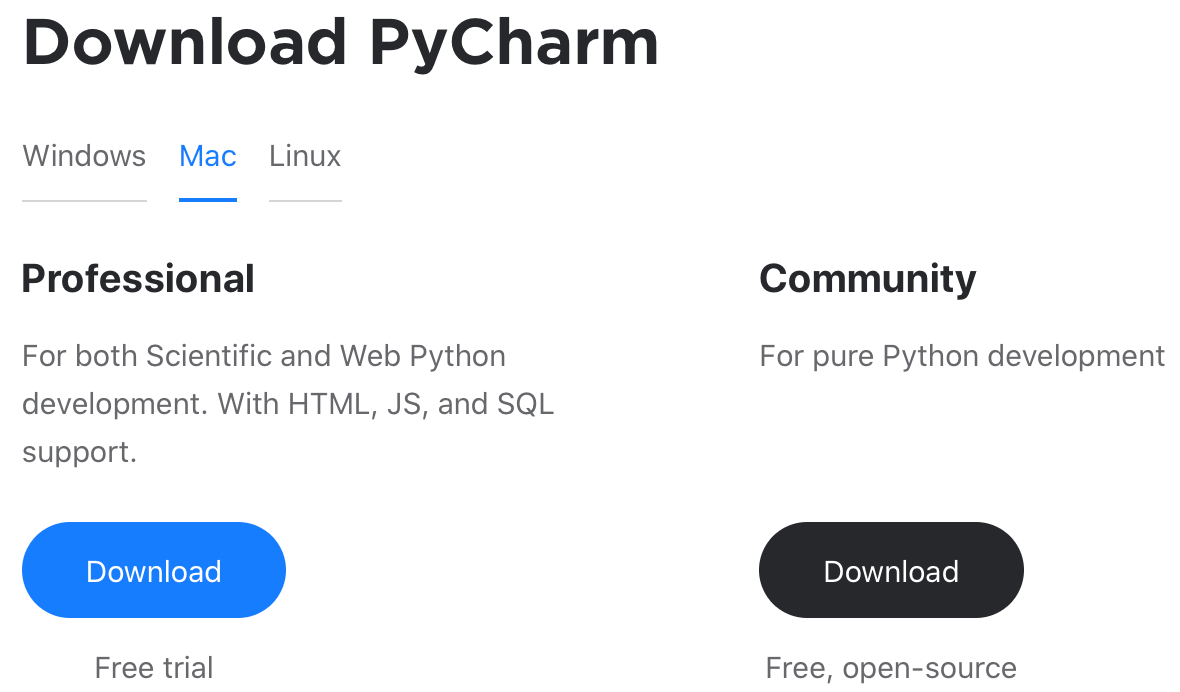
Now we are looking for an IDE that lets us work on files on the remote server and execute them! Thus, download and install PyCharm Professional Edition. If you install community edition, it does not provide you with the feature we are looking for. You can use your university mail to activate the license.

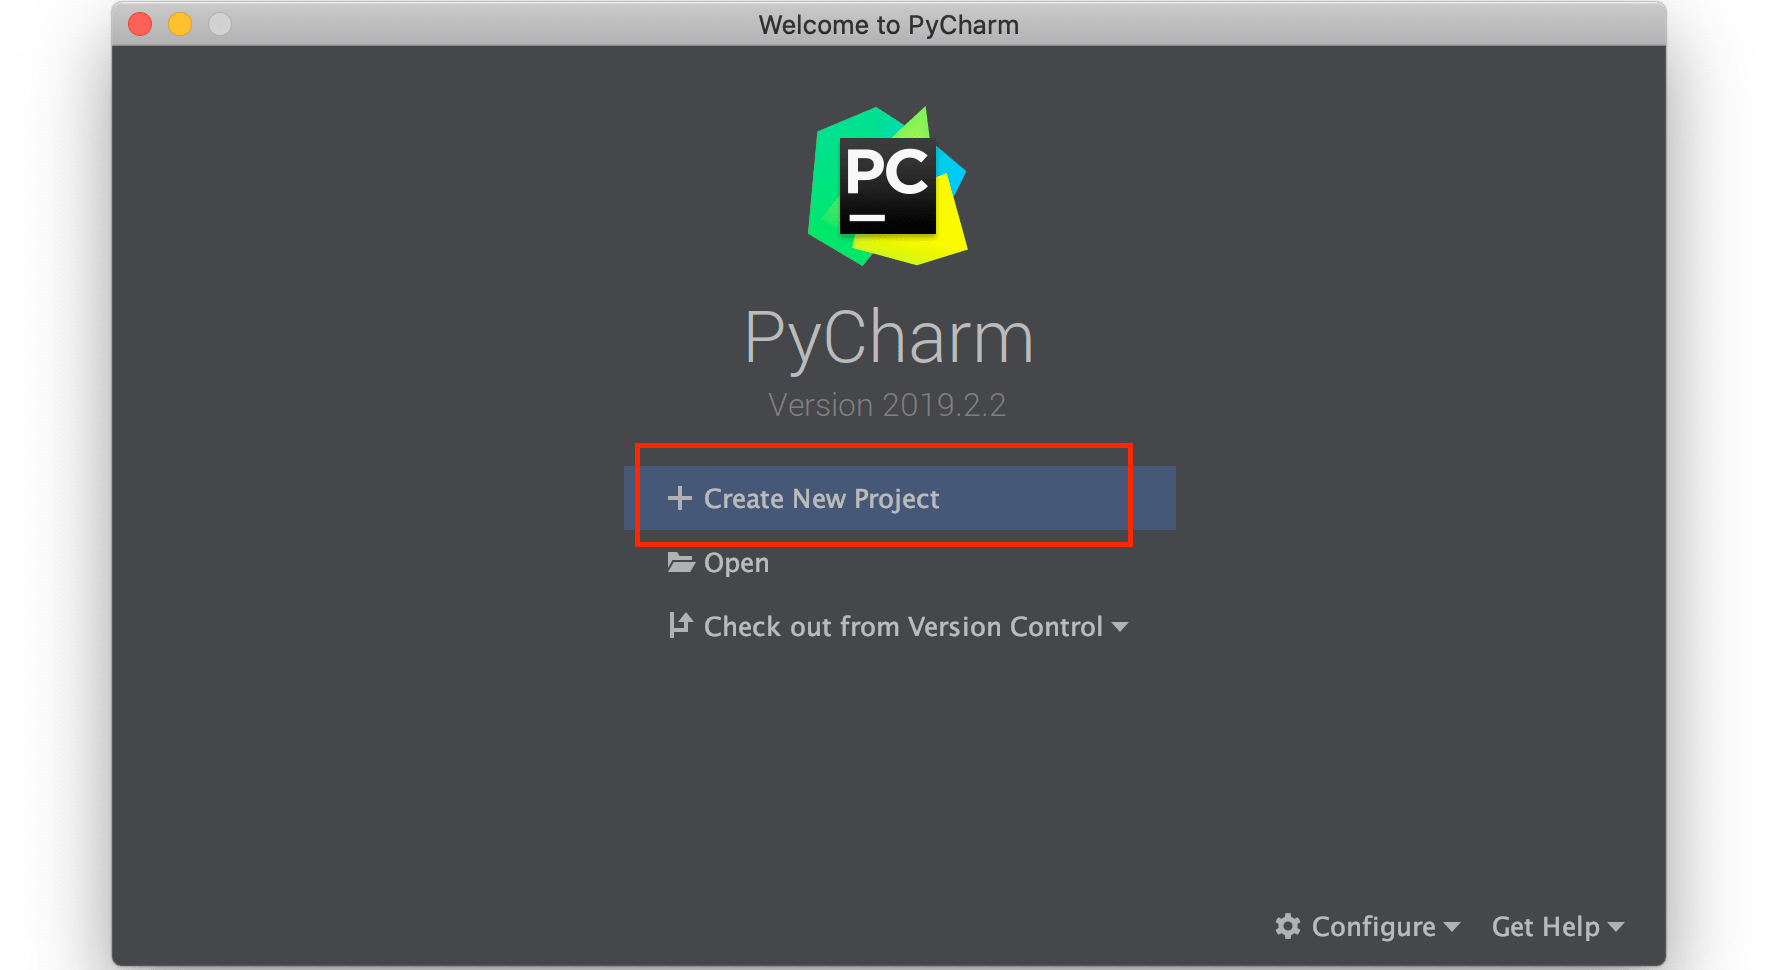
After installation lunch the IDE and select Create new project:
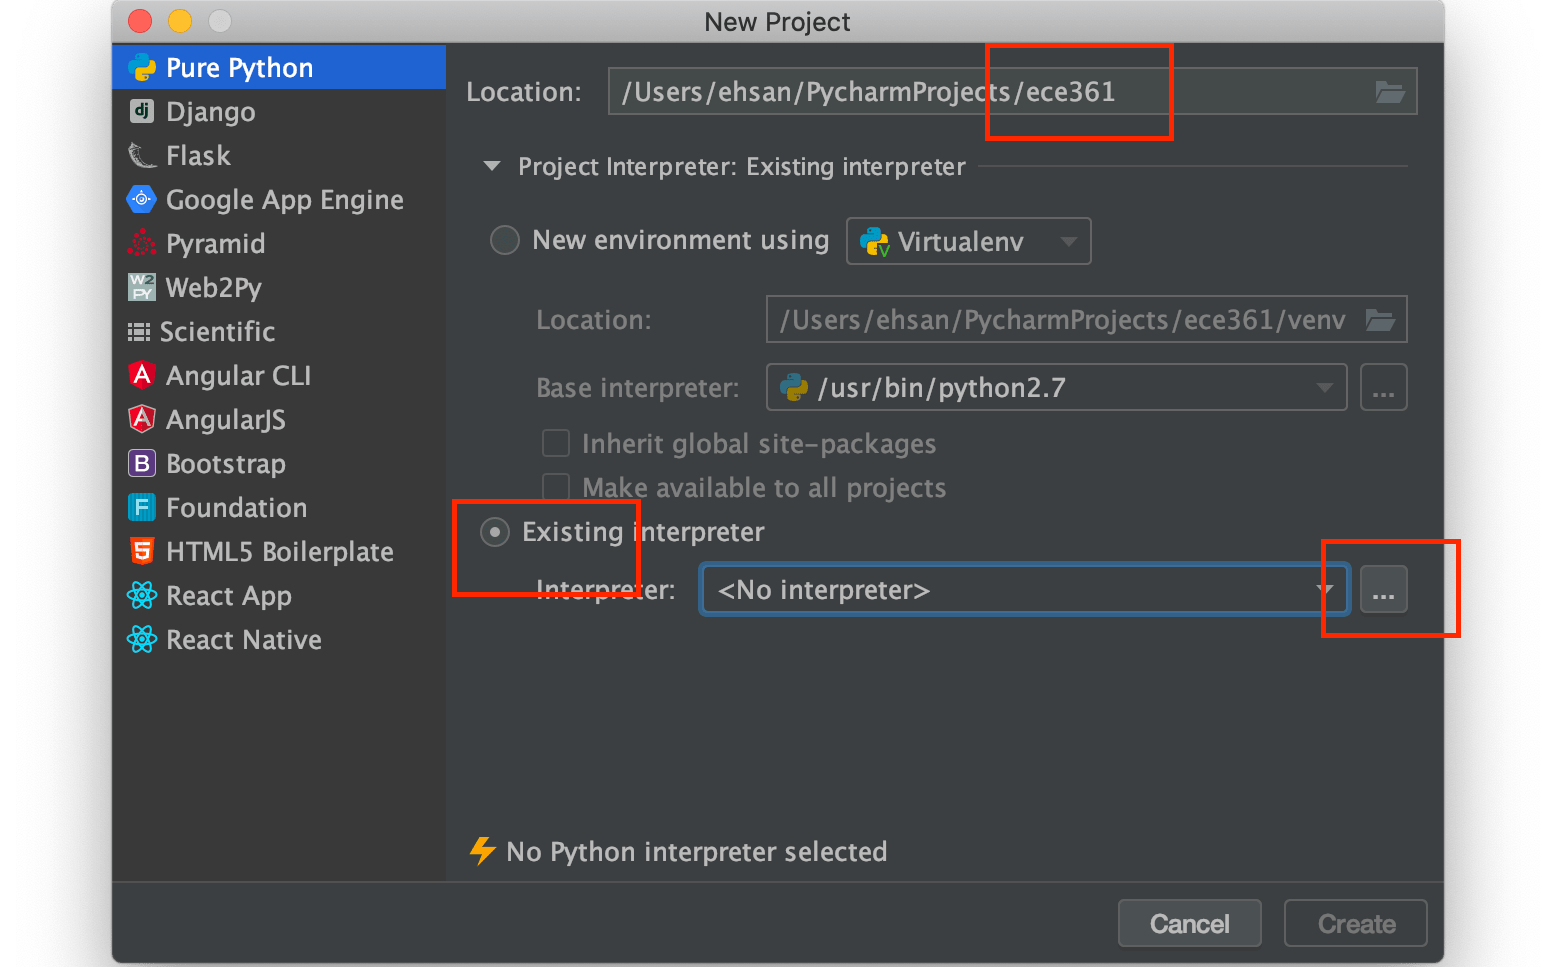
Enter a new name for the project and move forward according to the image below:
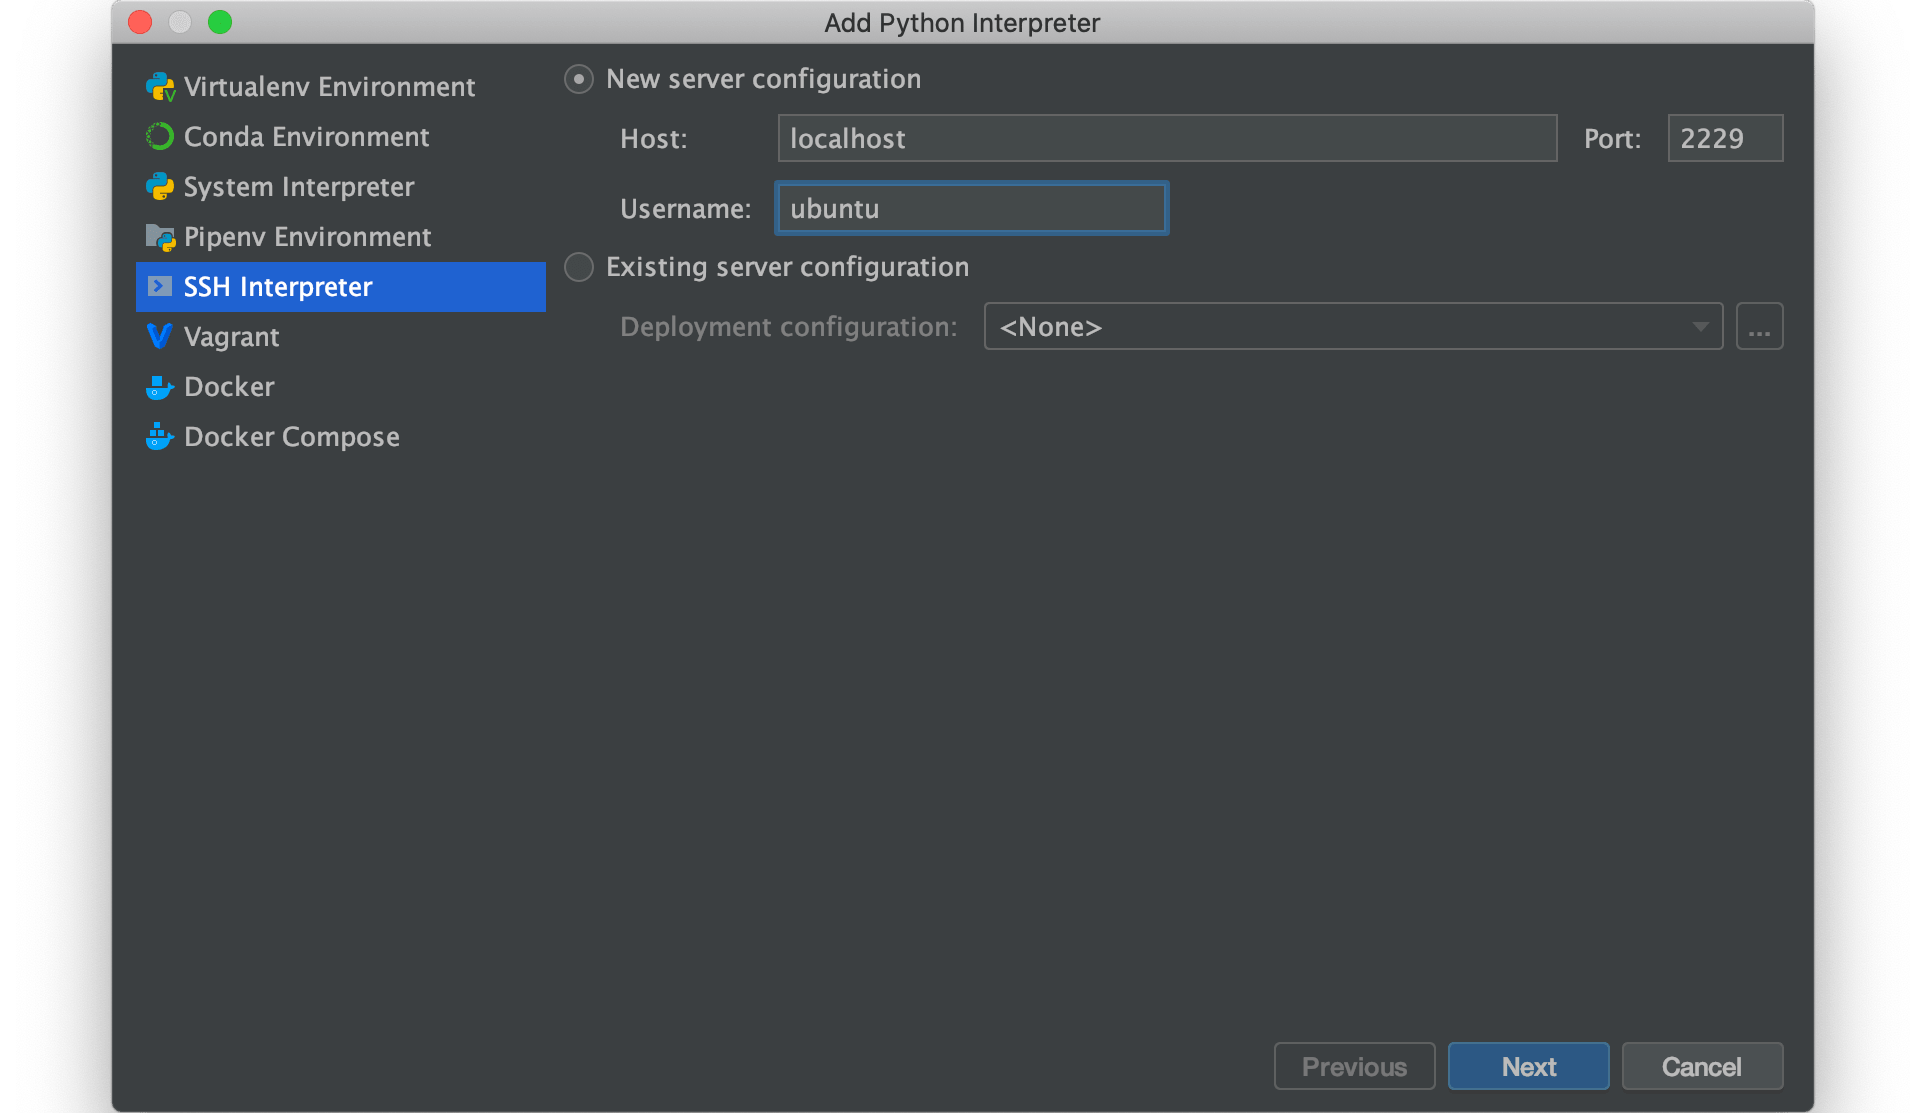
According to the image below, enter localhost and ubuntu for the Host and Username fields, respectively. Enter the port number 2229 in the port number field. Then press next.
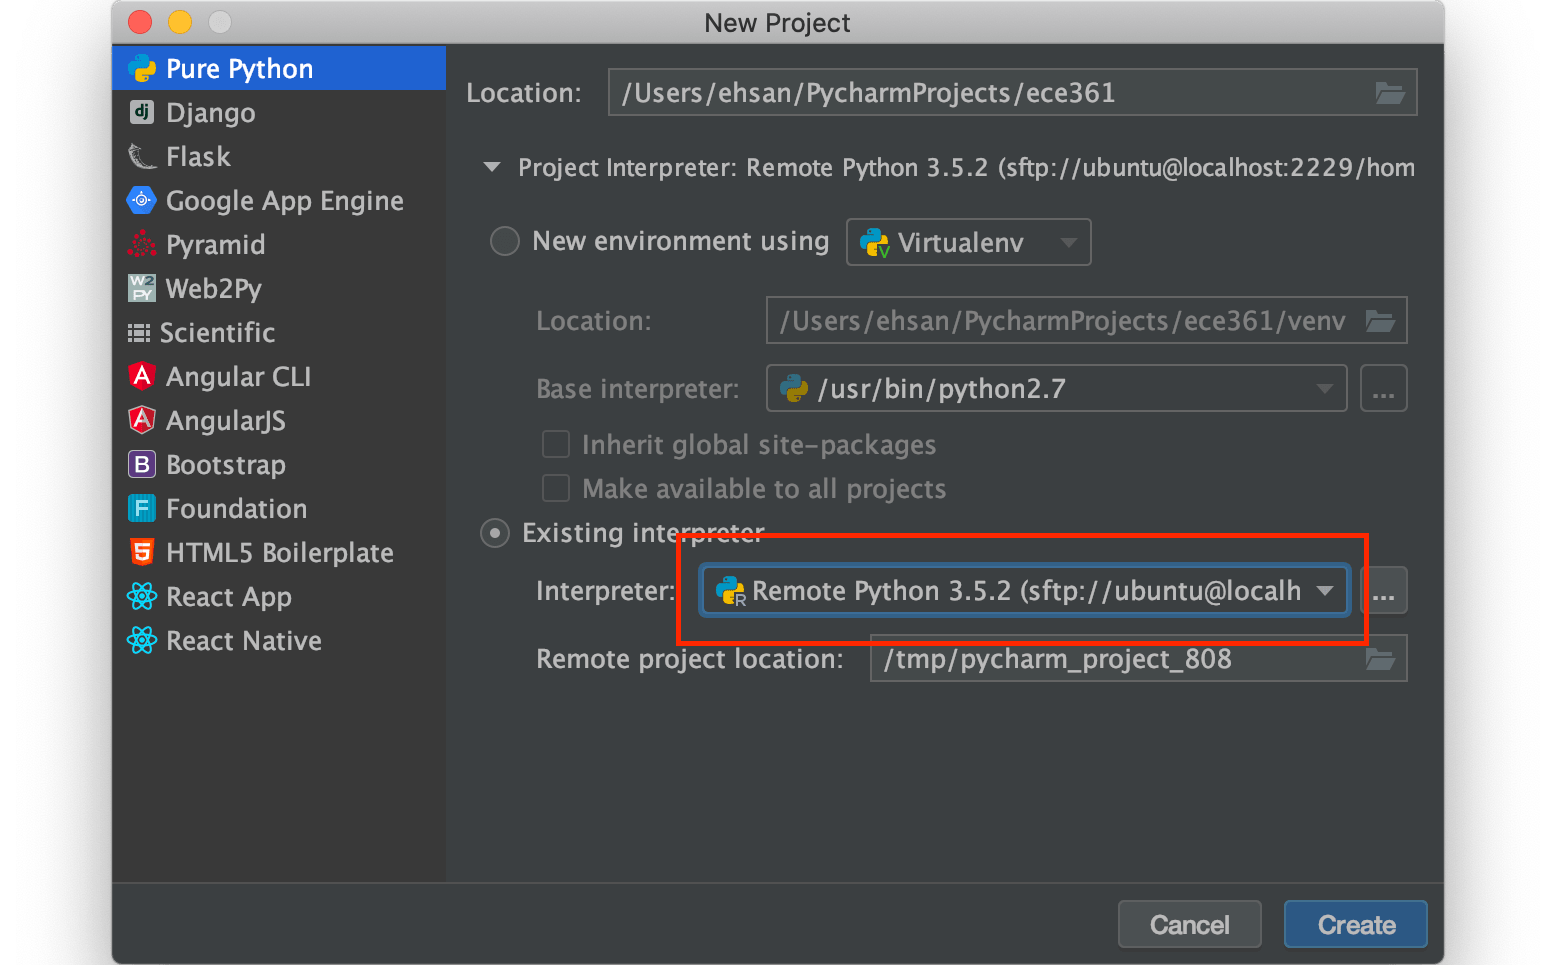
In the next step you give the path where the python binary is located. This can be the default python path in your system (you can get that using whereis python). However, we have to use the binaries provided within the lab. Similar to when you are using command source /home/ubuntu/lab1/sourceMe. Therefore, enter the path according to the figure below and press finish:
/home/ubuntu/lab1/.venv/bin/python3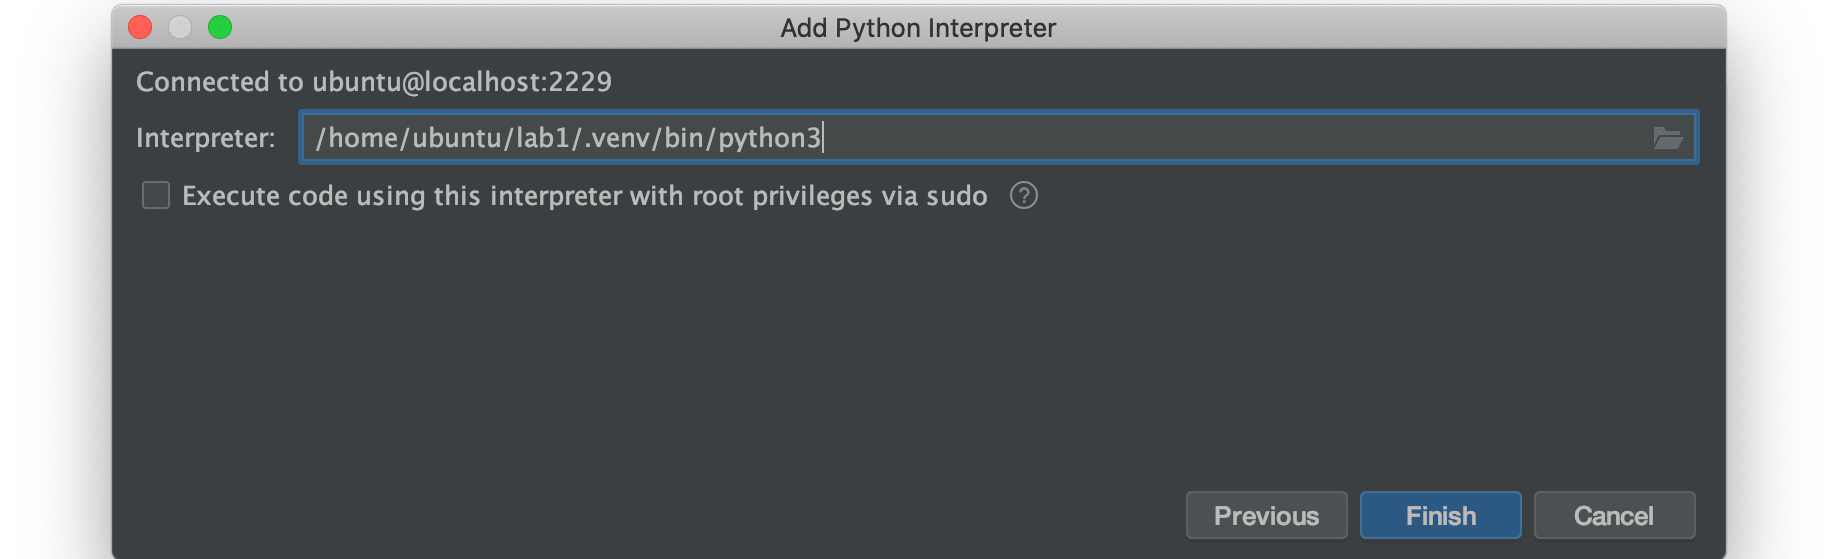
In the next step, make sure you have selected the Remote interpreter like what you see in the picture below:
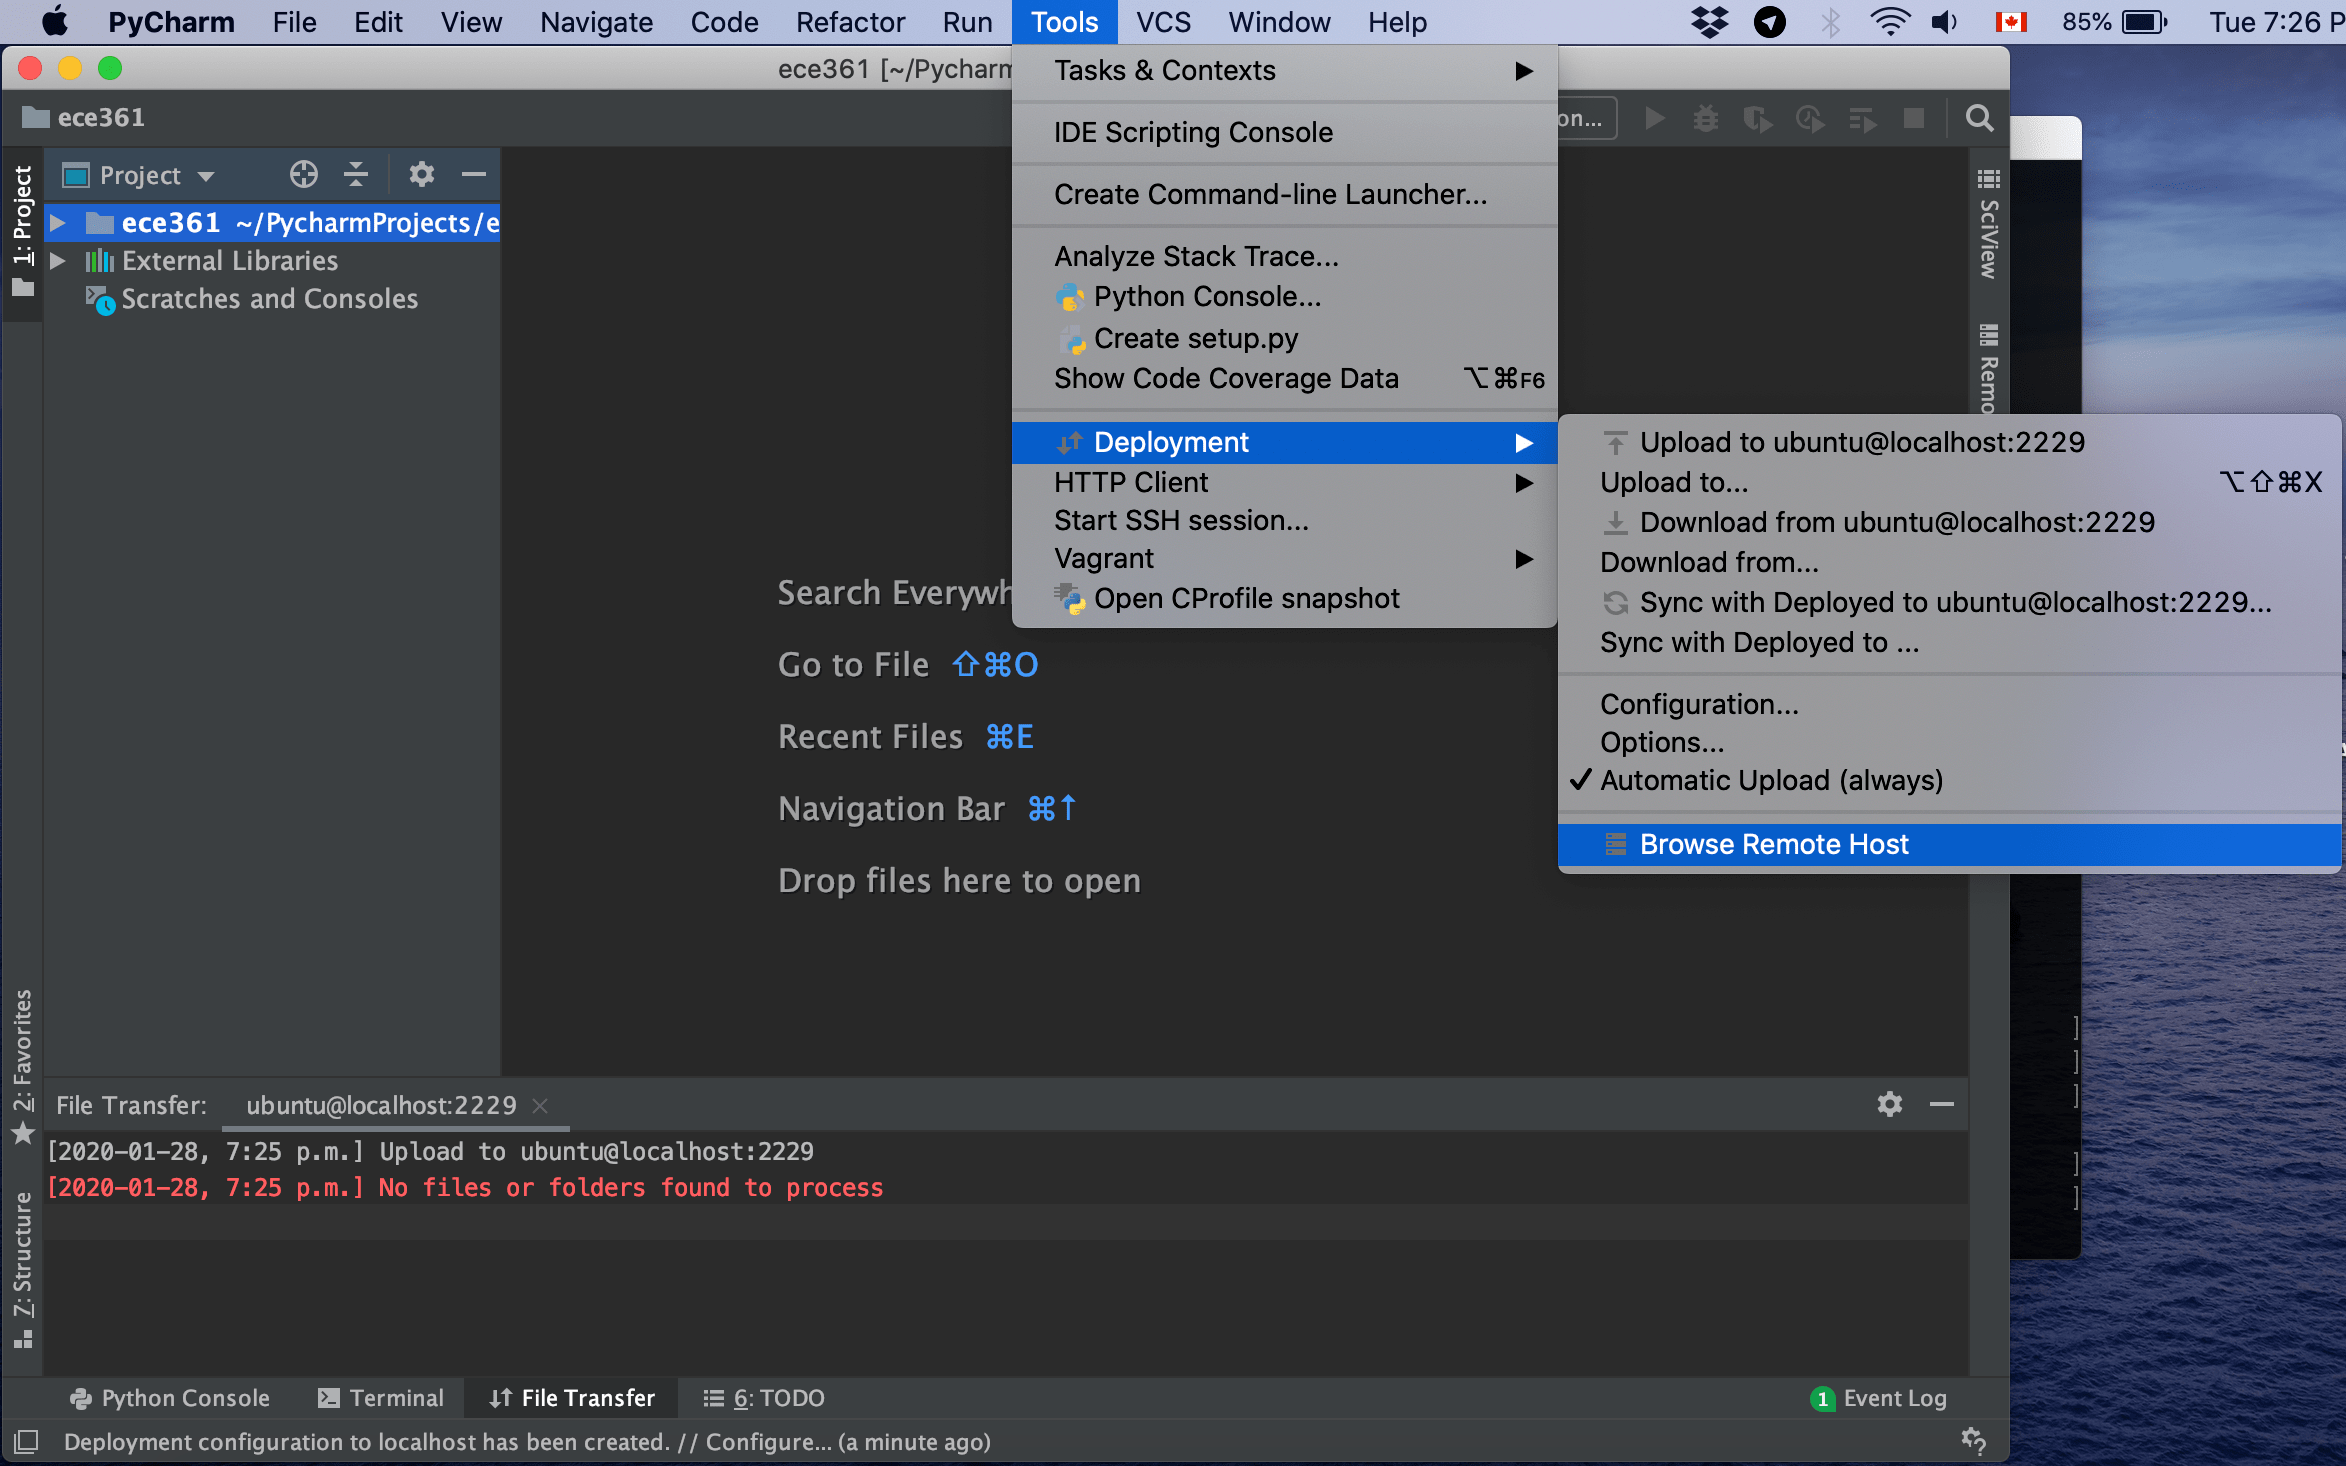
Now you have created a project using VM’s python interpreter. Let’s copy files from the VM into the host in order to start editing them. Go to tools, Deployment and then Browse Remote Host:
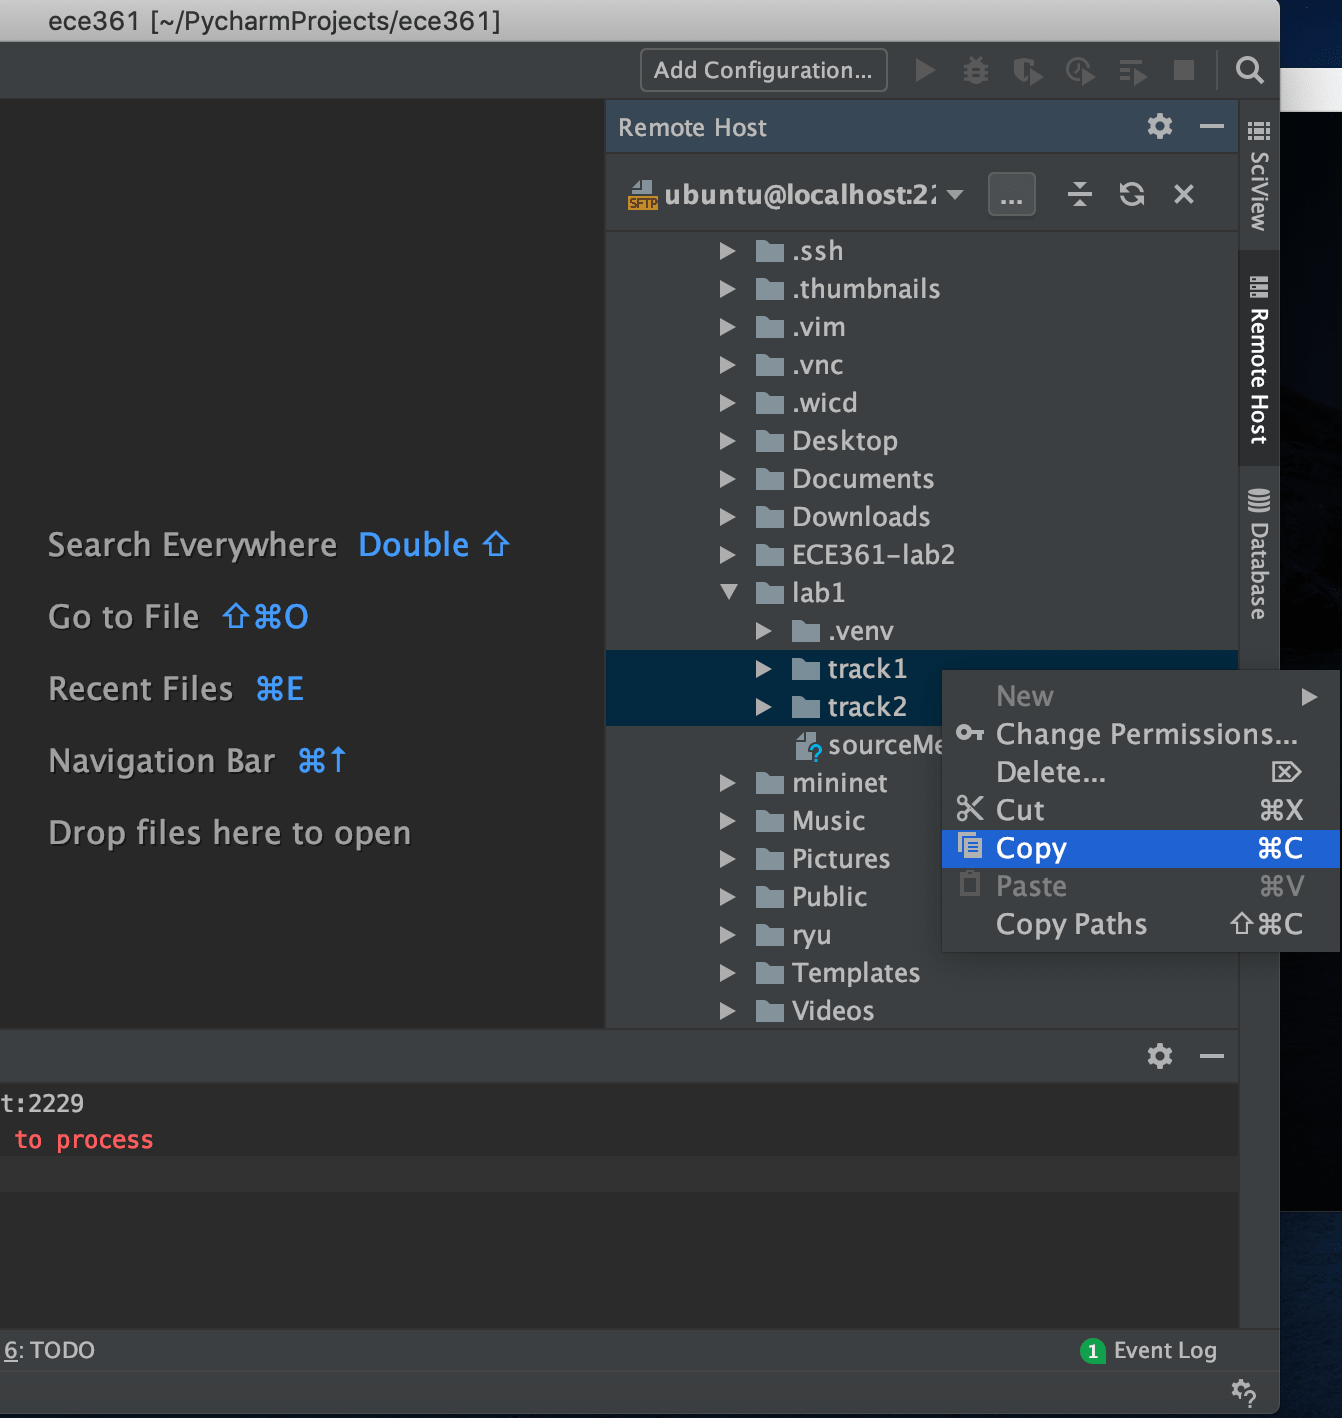
In the newly opened window, look for home, then ubuntu and lab1. Open the lab1 folder and select both folders track1 and track2 by pressing ctrl button. Then press right-click and select copy according to the image below:
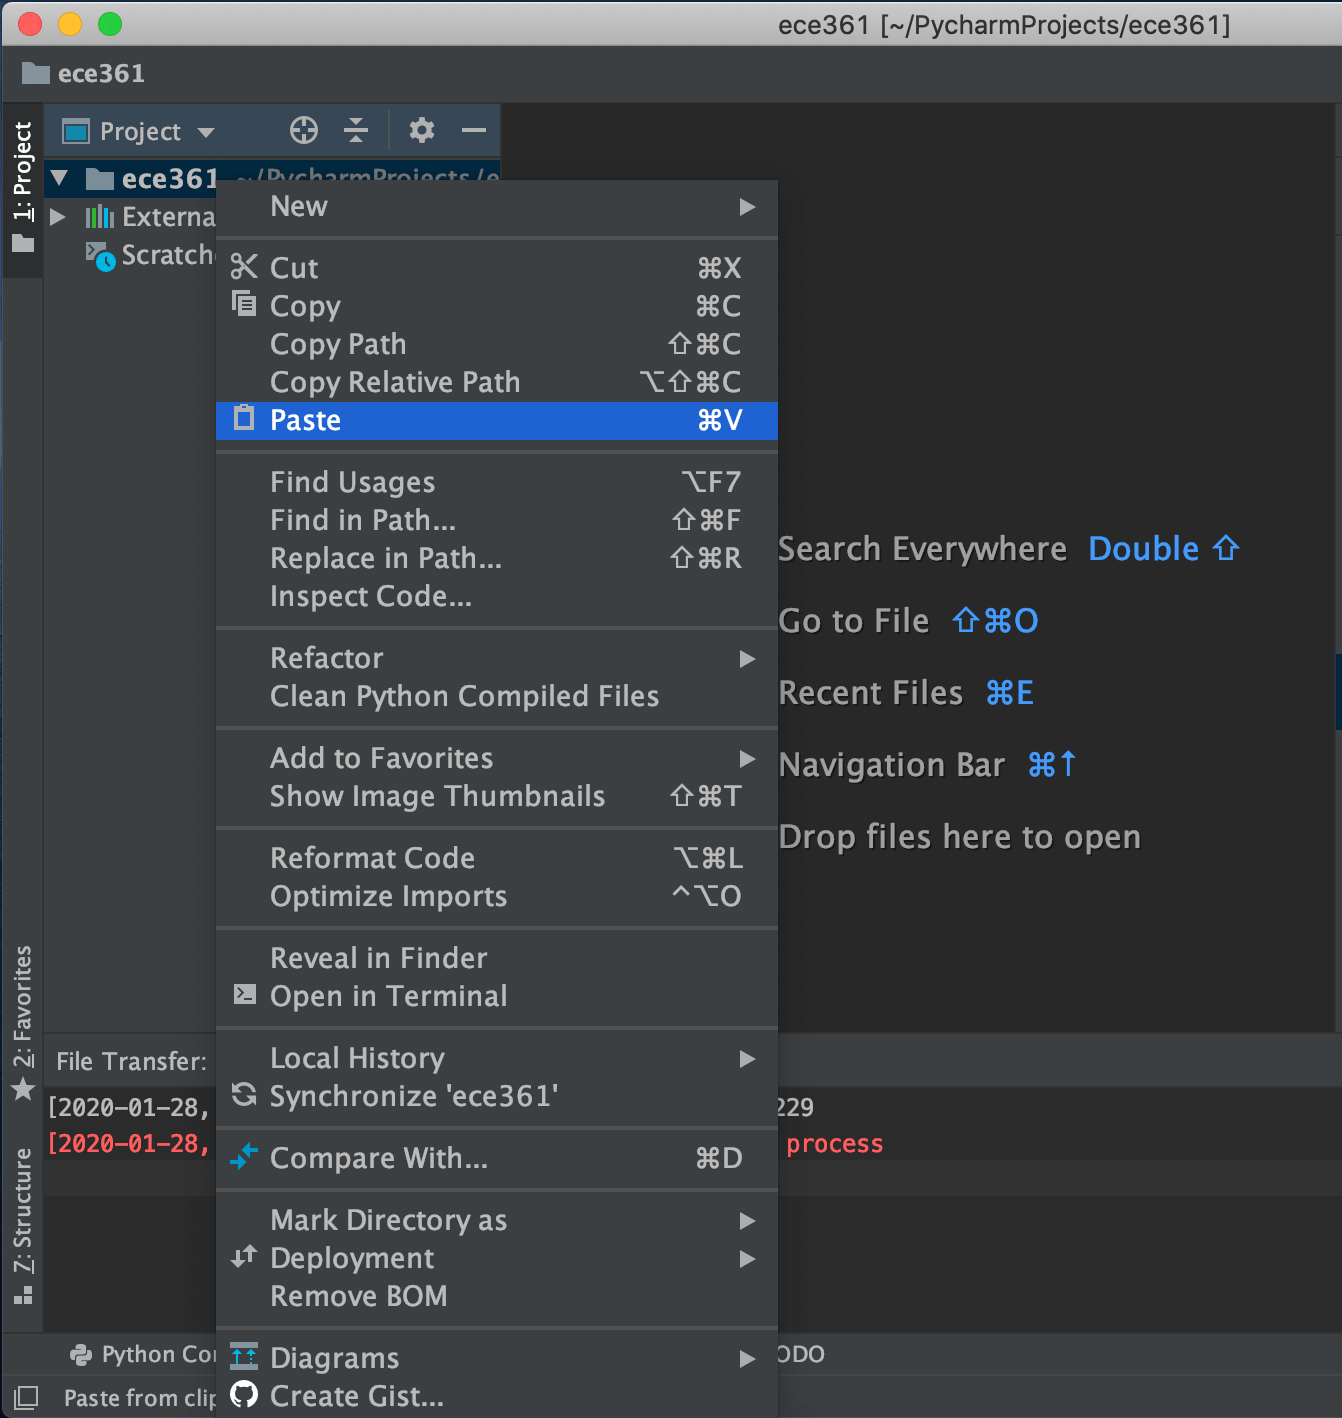
Go to the Project windows in the left side of IDE and past folders inside your project folder:
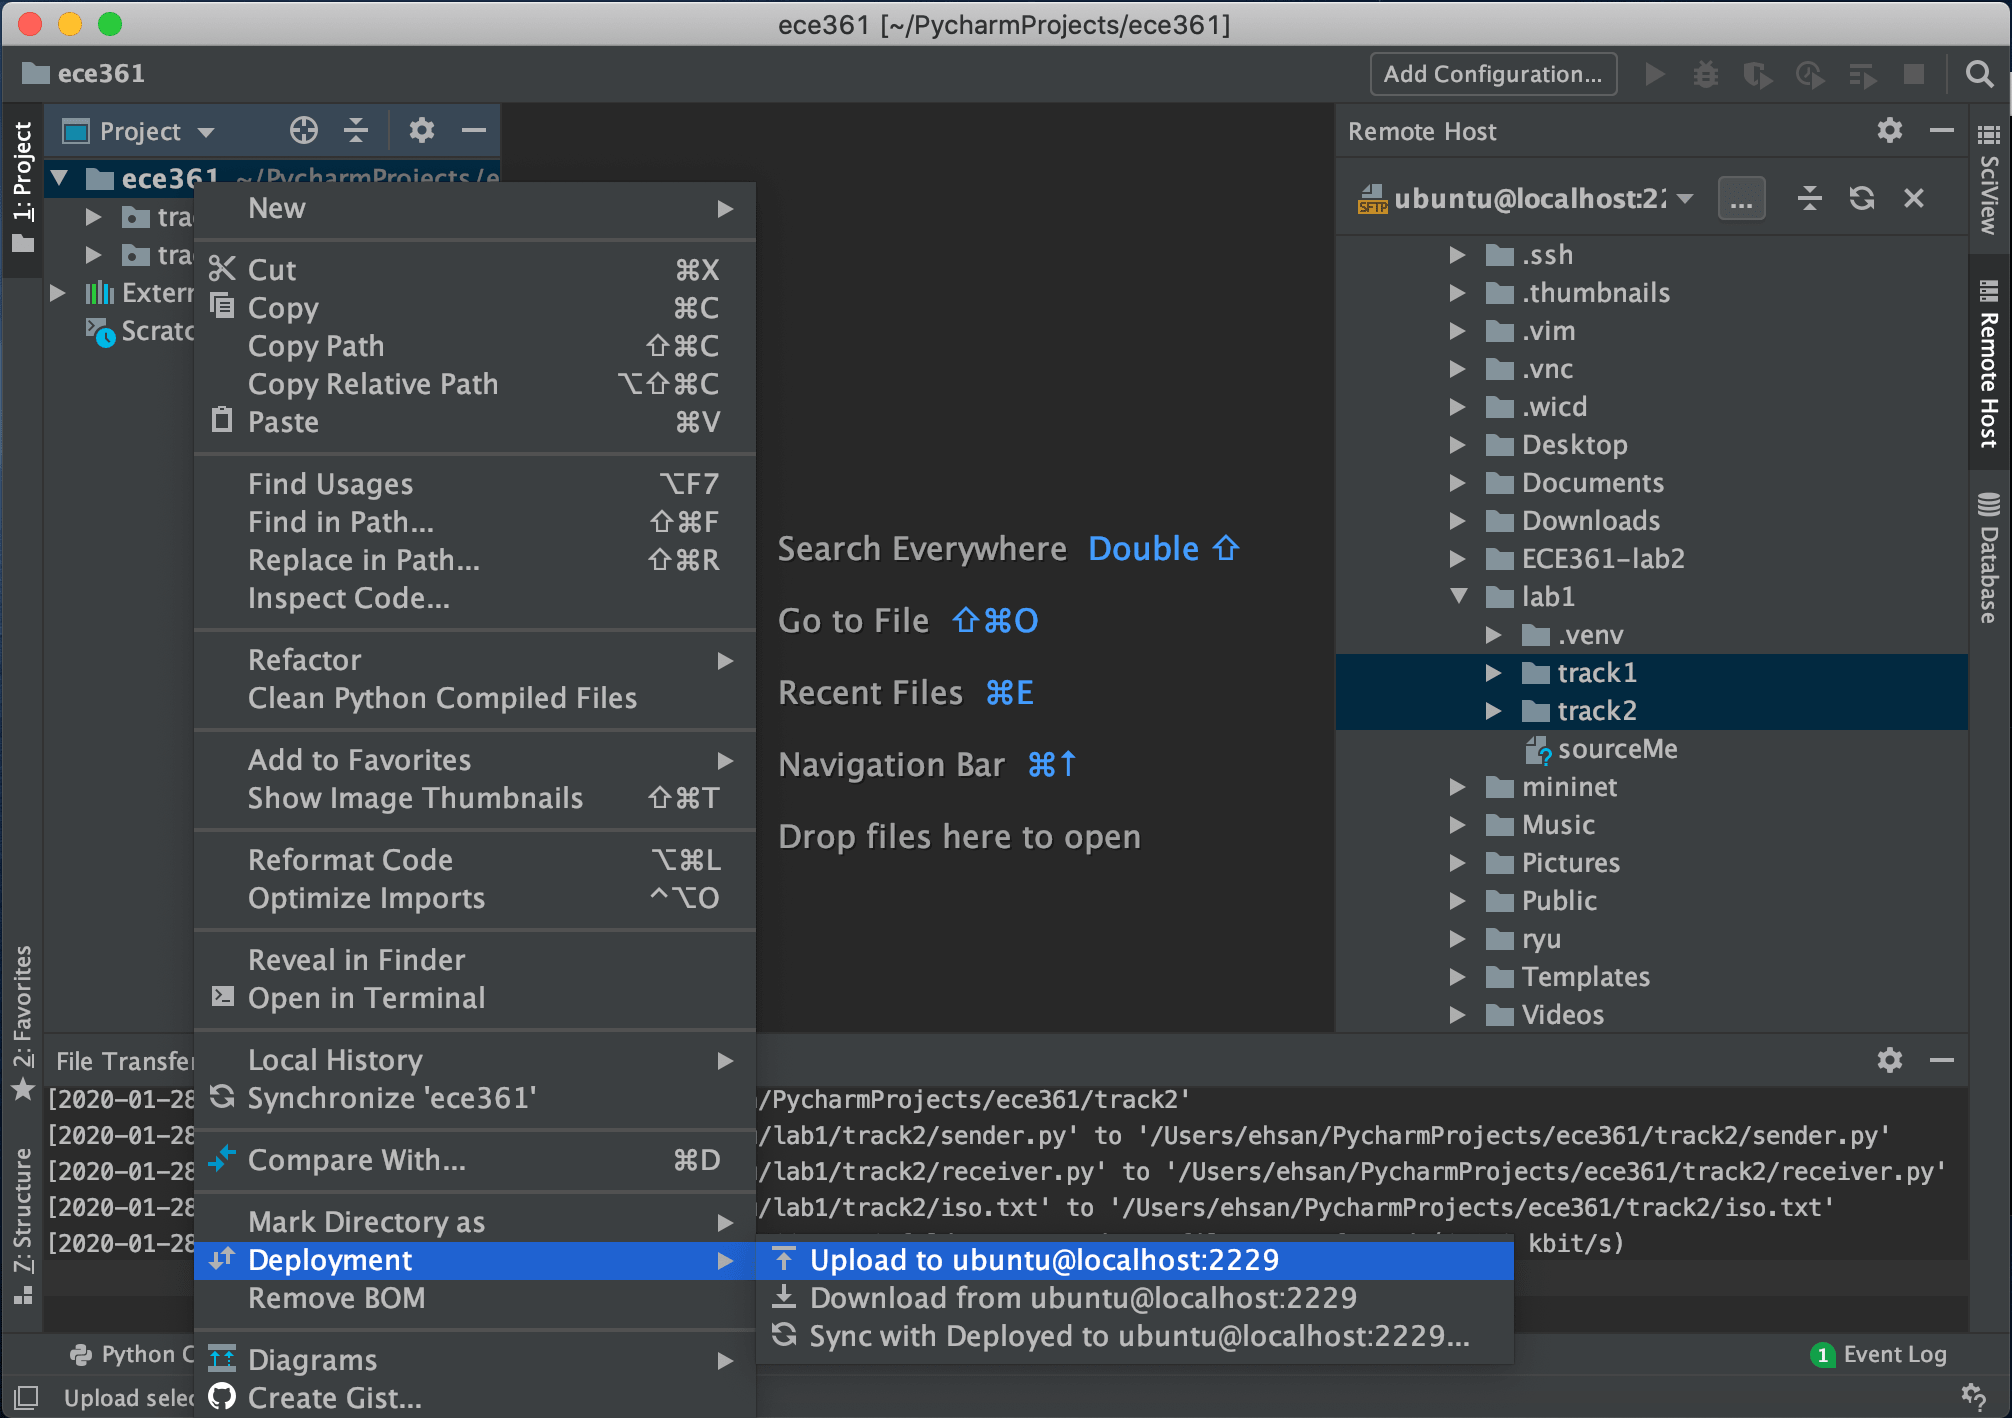
So now you have lab files from the VM. Before starting to open and work on them, let’s sync your host with the VM so that the changes you are going to make are being synced with the files in the VM. Thus, click on folder project, go to the Deployment and select upload to ubuntu@localhost:2229, like the image below:
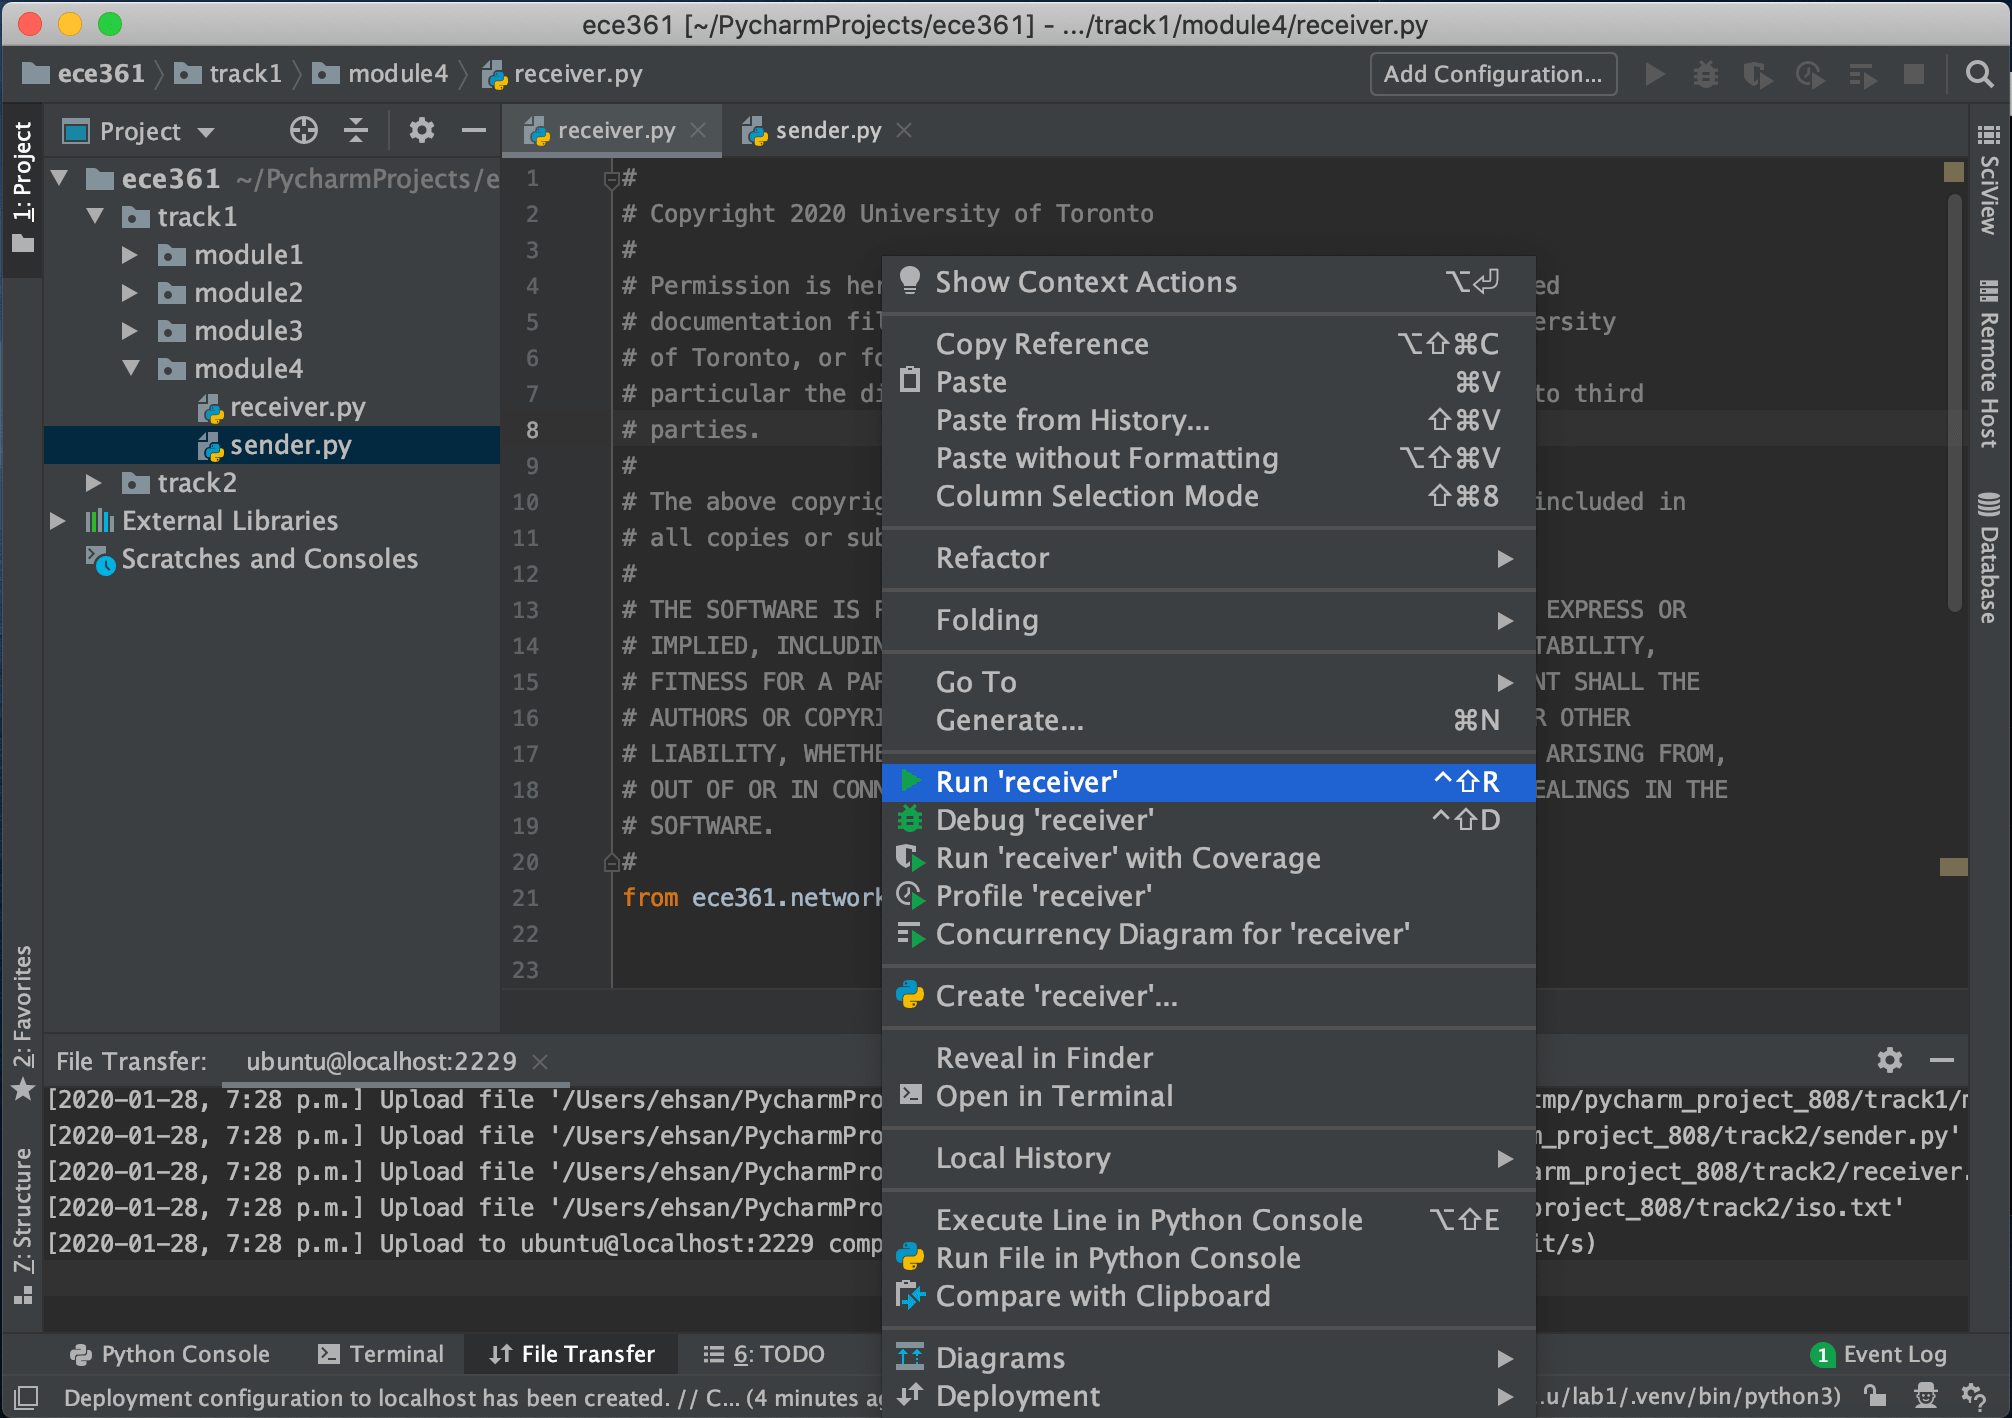
Now you are ready to open files, edit and execute them. So let’s open folder track1/module4 and then receiver.py and sender.py. Then run the receiver.py and then do the same for the sender.py:
Now you get results of the execution of each file on the bottom window and it’s like when you are running on two separate terminals inside the VM.
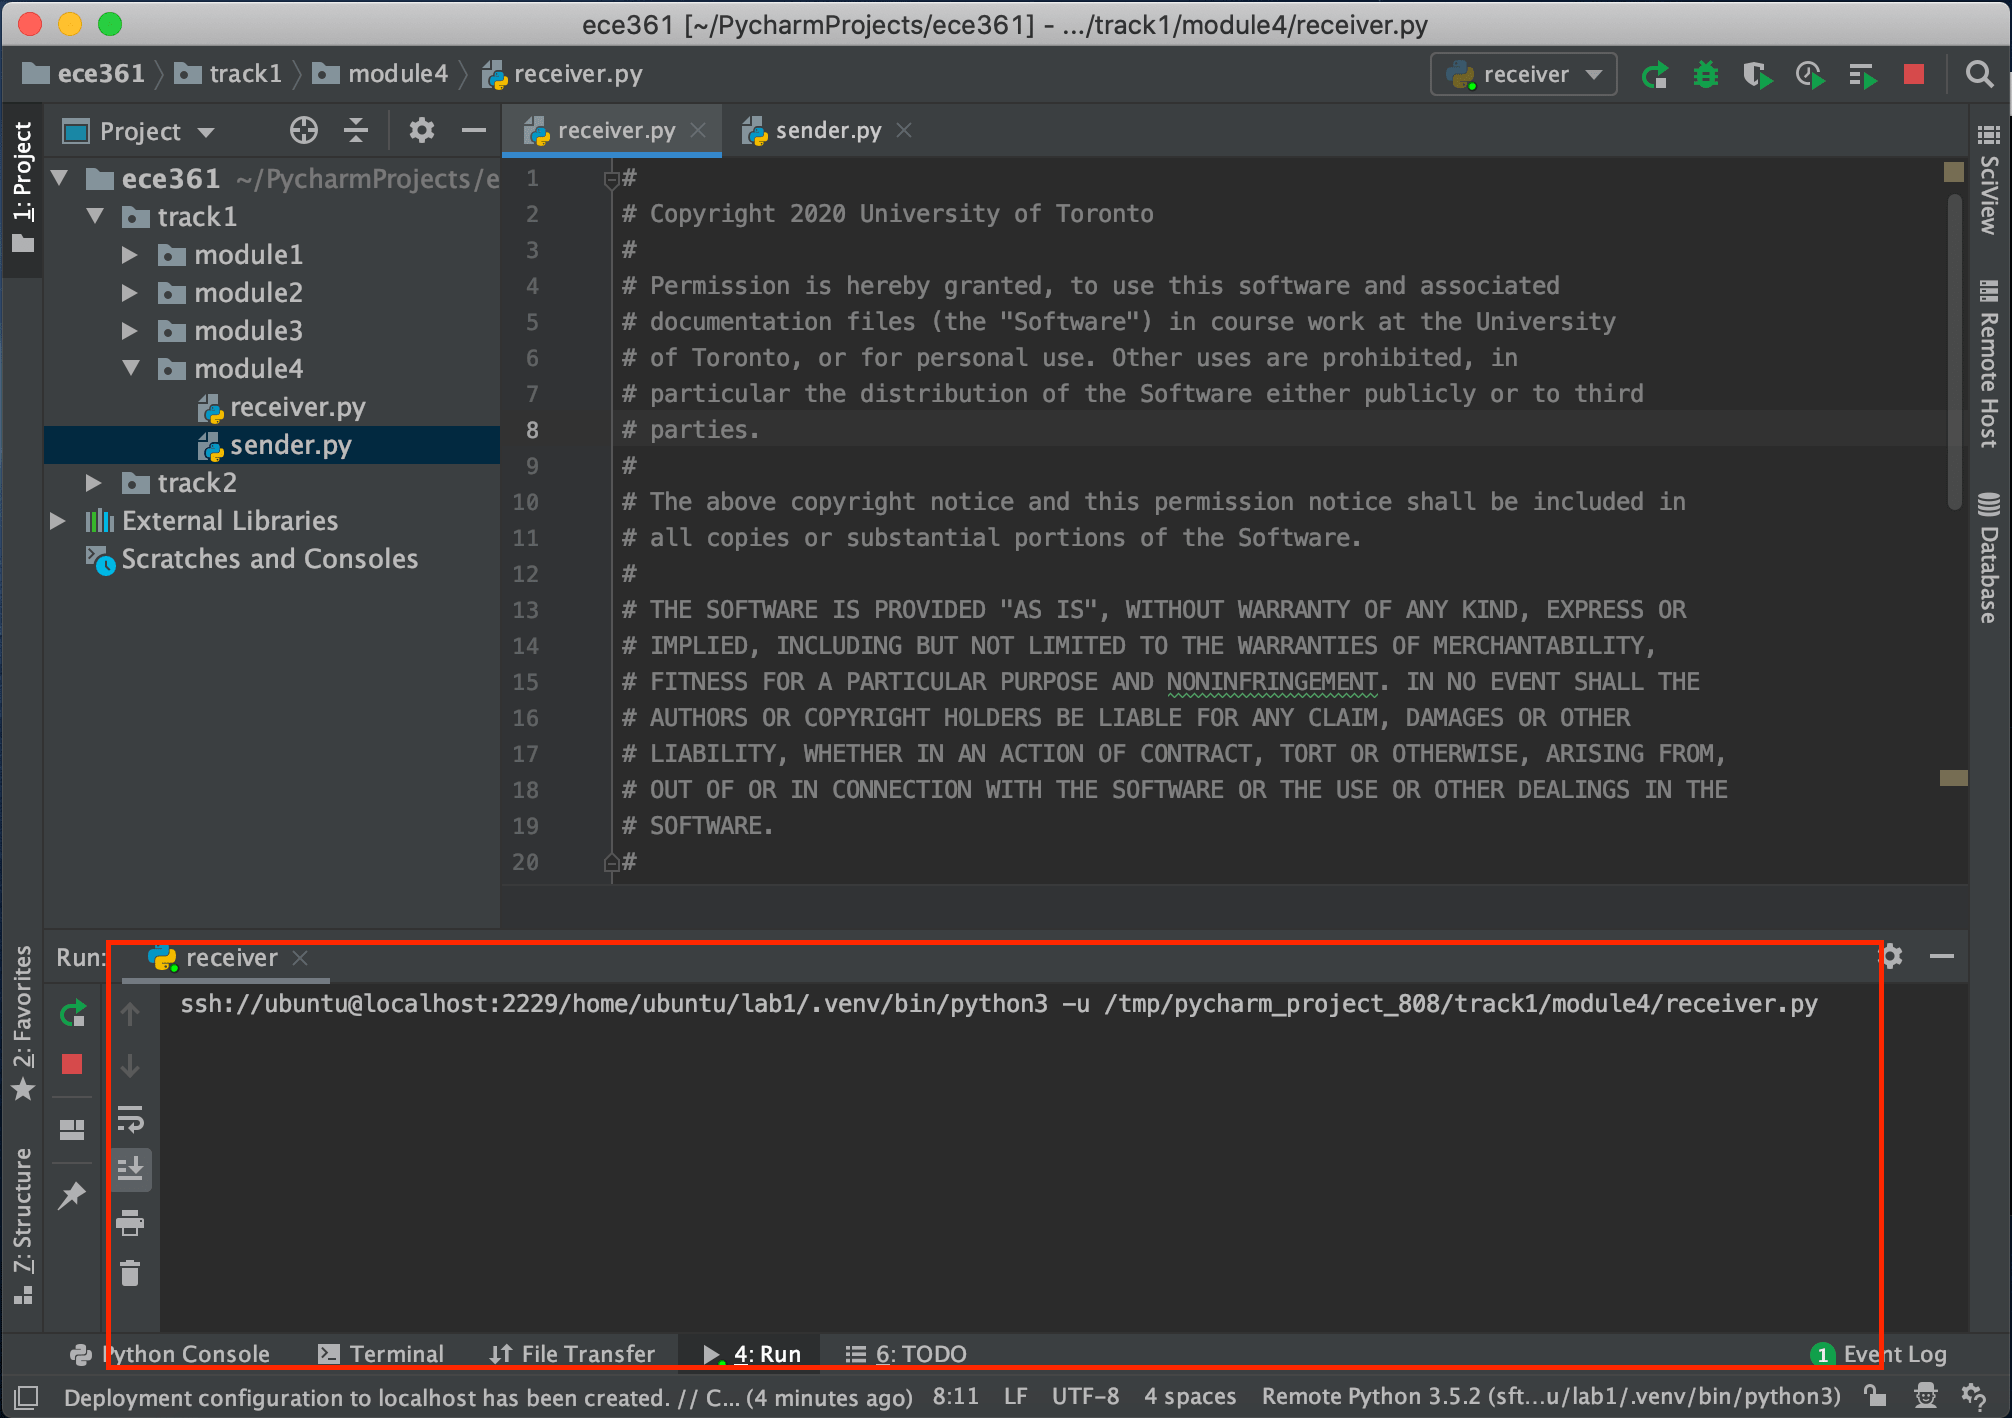
Congratulations! You have successfully edited and executed your files on the remote VM!
Want to read more?
Check out these pages:- Kubebuilder Admission Webhook for Core Types
- Kubernetes Object Configuration with Kustomize
- A Guide to CA, CSR, CRT, and Keys (Digital Certificates)
- Deploy a Local Kubernetes Webhook Server
- Linux iptables Reference Guide with Examples
- Configuring sFlow on Dell Switch with OS9
- Configuring WebDAV Access for Zotero on Ubuntu
- Dell Switch Configuration Commands
- Route Traffic through a Private Network using Dynamic Port Forwarding and Proxy SwitchyOmega
- Access to the SAVI using CLI
- Connect to Existing Running Desktop Session using x11vnc
- Install Ubuntu 20.04 via PXE UEFI Setup
- Access to the SAVI using Web Portal
- Reverse SSH to Access Hosts Behind the NAT
- VNC Server in Ubuntu 16.04, 18.04 and CentOS 7
- Create an Overlay Network in Ubuntu using Open vSwitch (OVS)