Access to the SAVI using Web Portal
We assume that you have already got access to use SAVI and the focus of this tutorial is to show how to create your virtual machine using the web interface. Please note that access to the SAVI using terminal (client1) is more stable and robust.
Getting Started
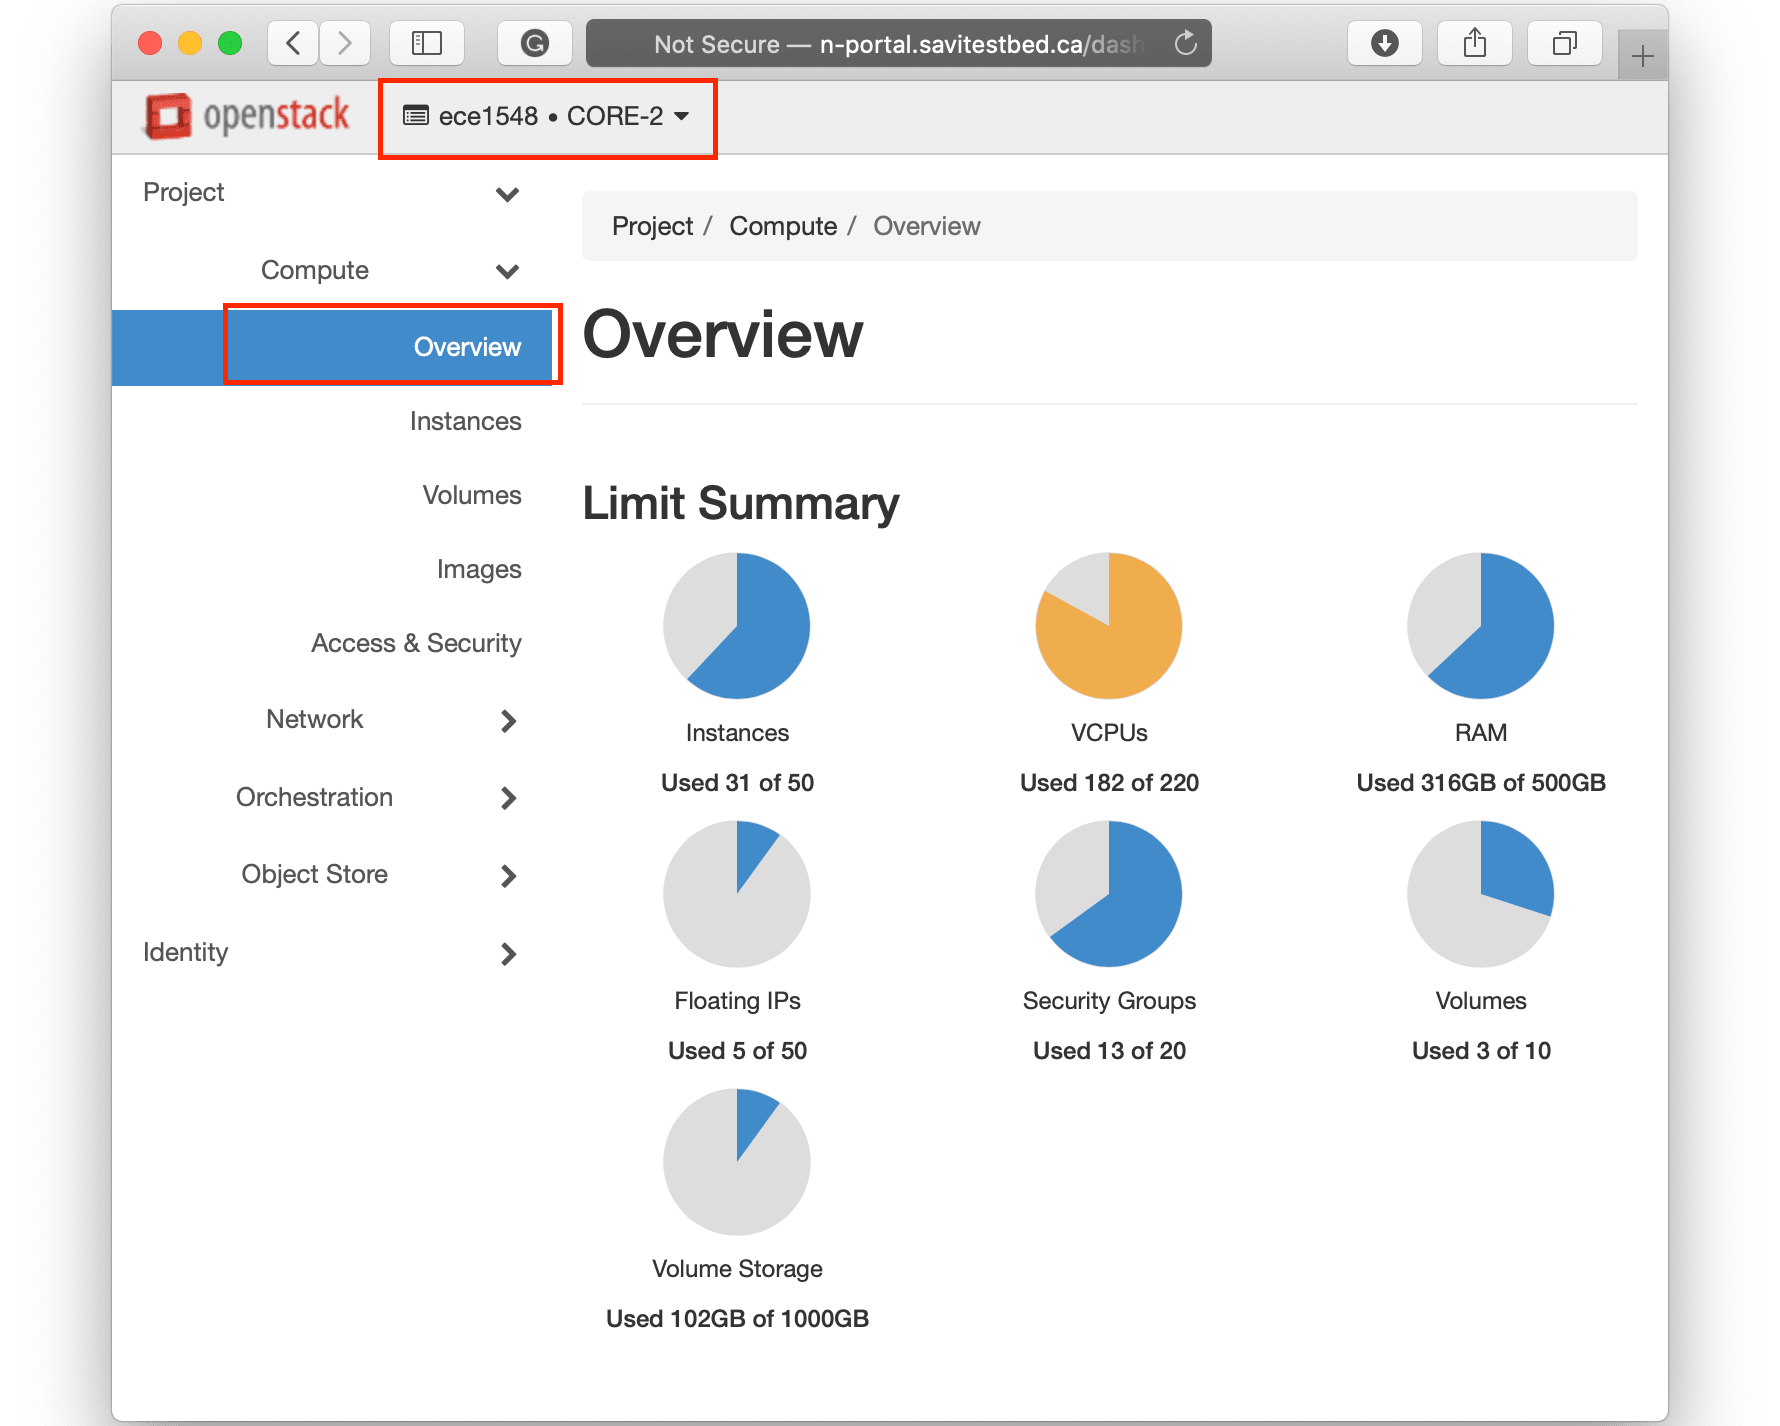
Log in and Overview Page
Log in to the SAVI using the portal by your credentials. Once you log in to the portal, you can change the region and the project you have access to. Currently, the best region to use is CORE and CORE-2. Some regions may not be available temporarily. If you encounter any errors when you log in, please change the region.
Create a New Instance (VM)
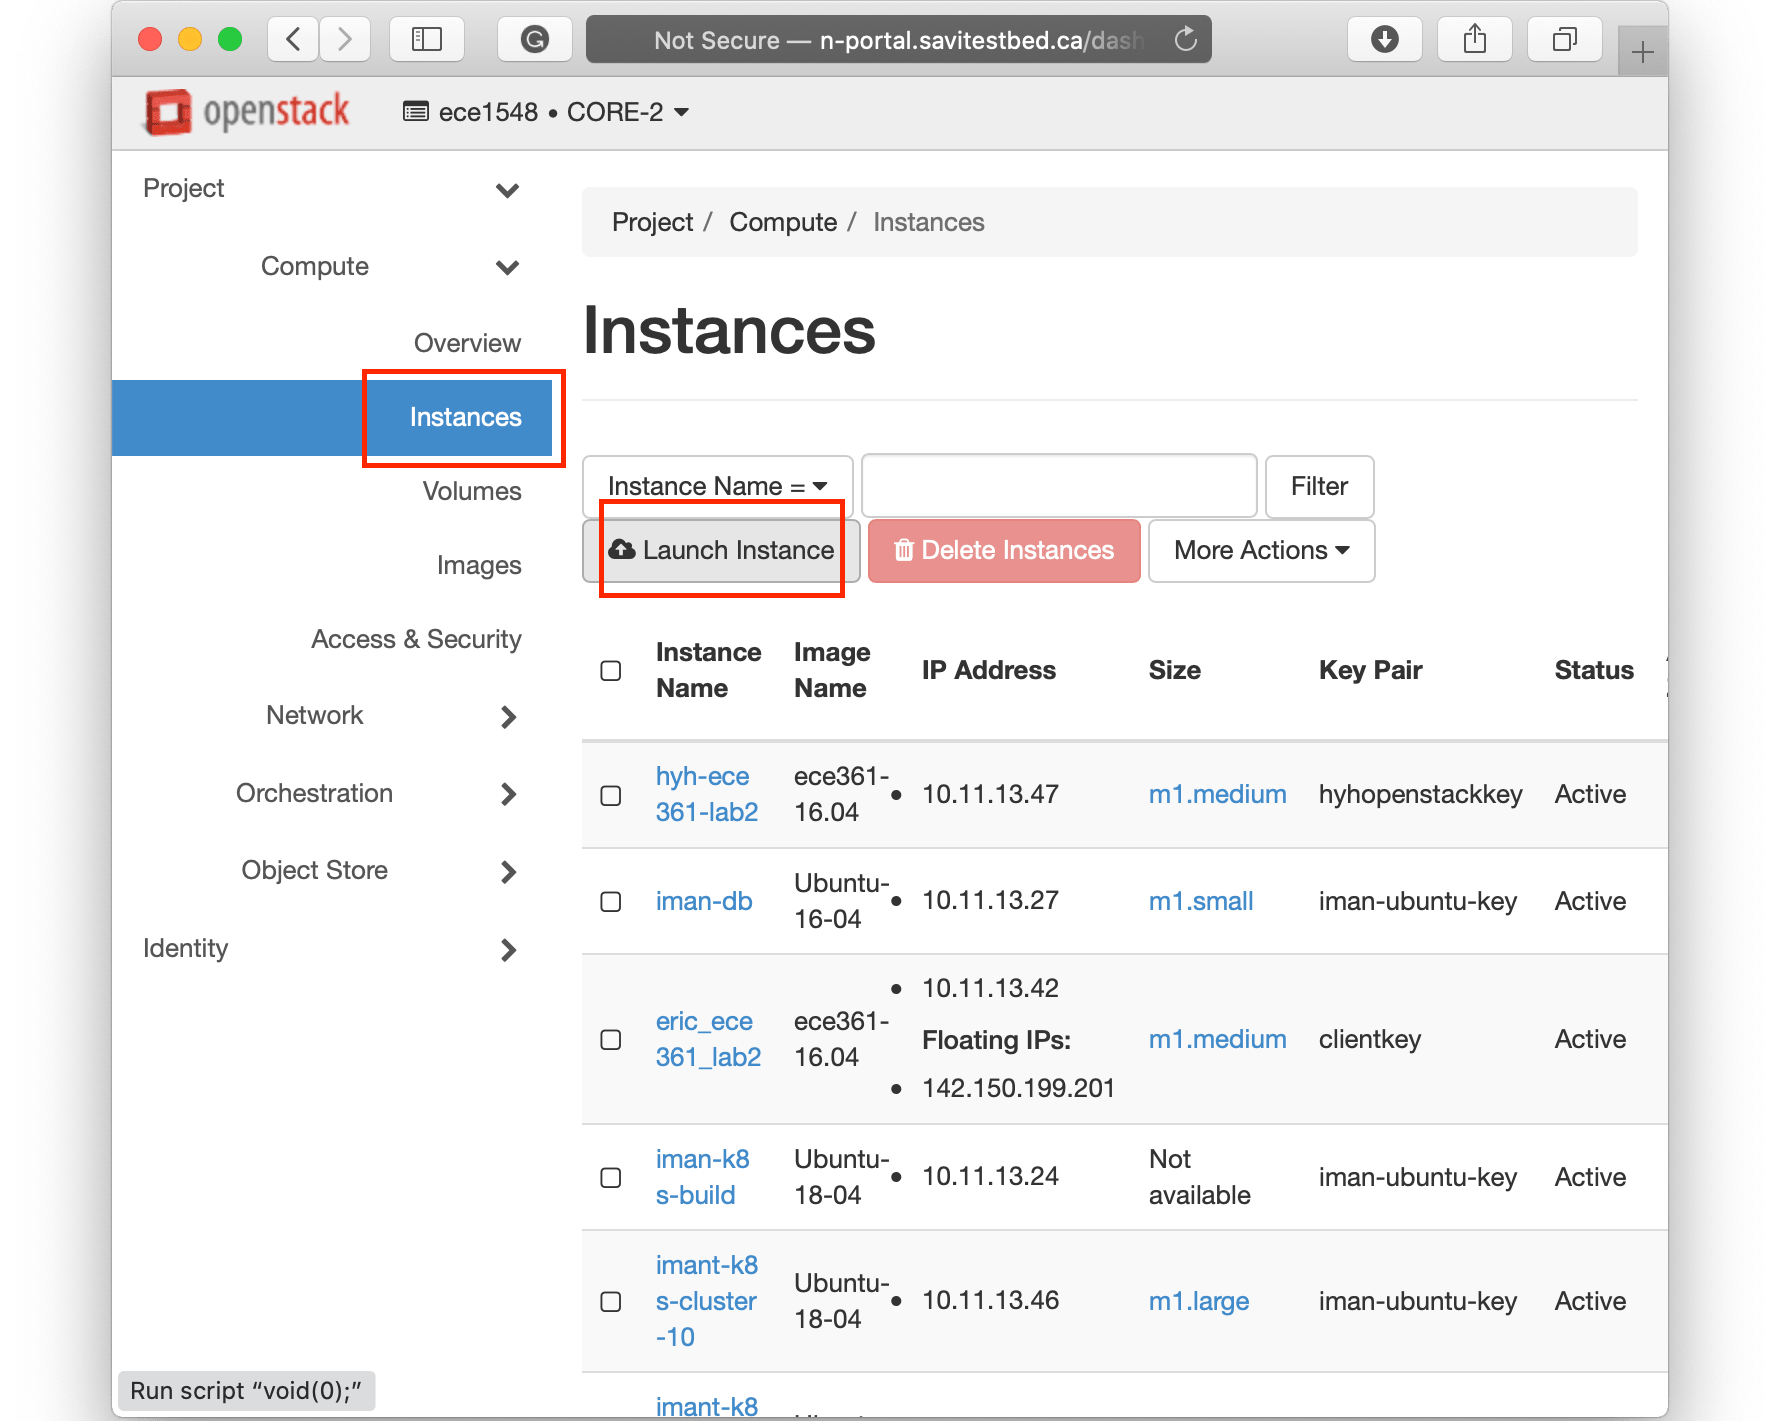
Click on the instance menu. You will see other instances which are for other people working on the same project. Click on the Launch Instance.
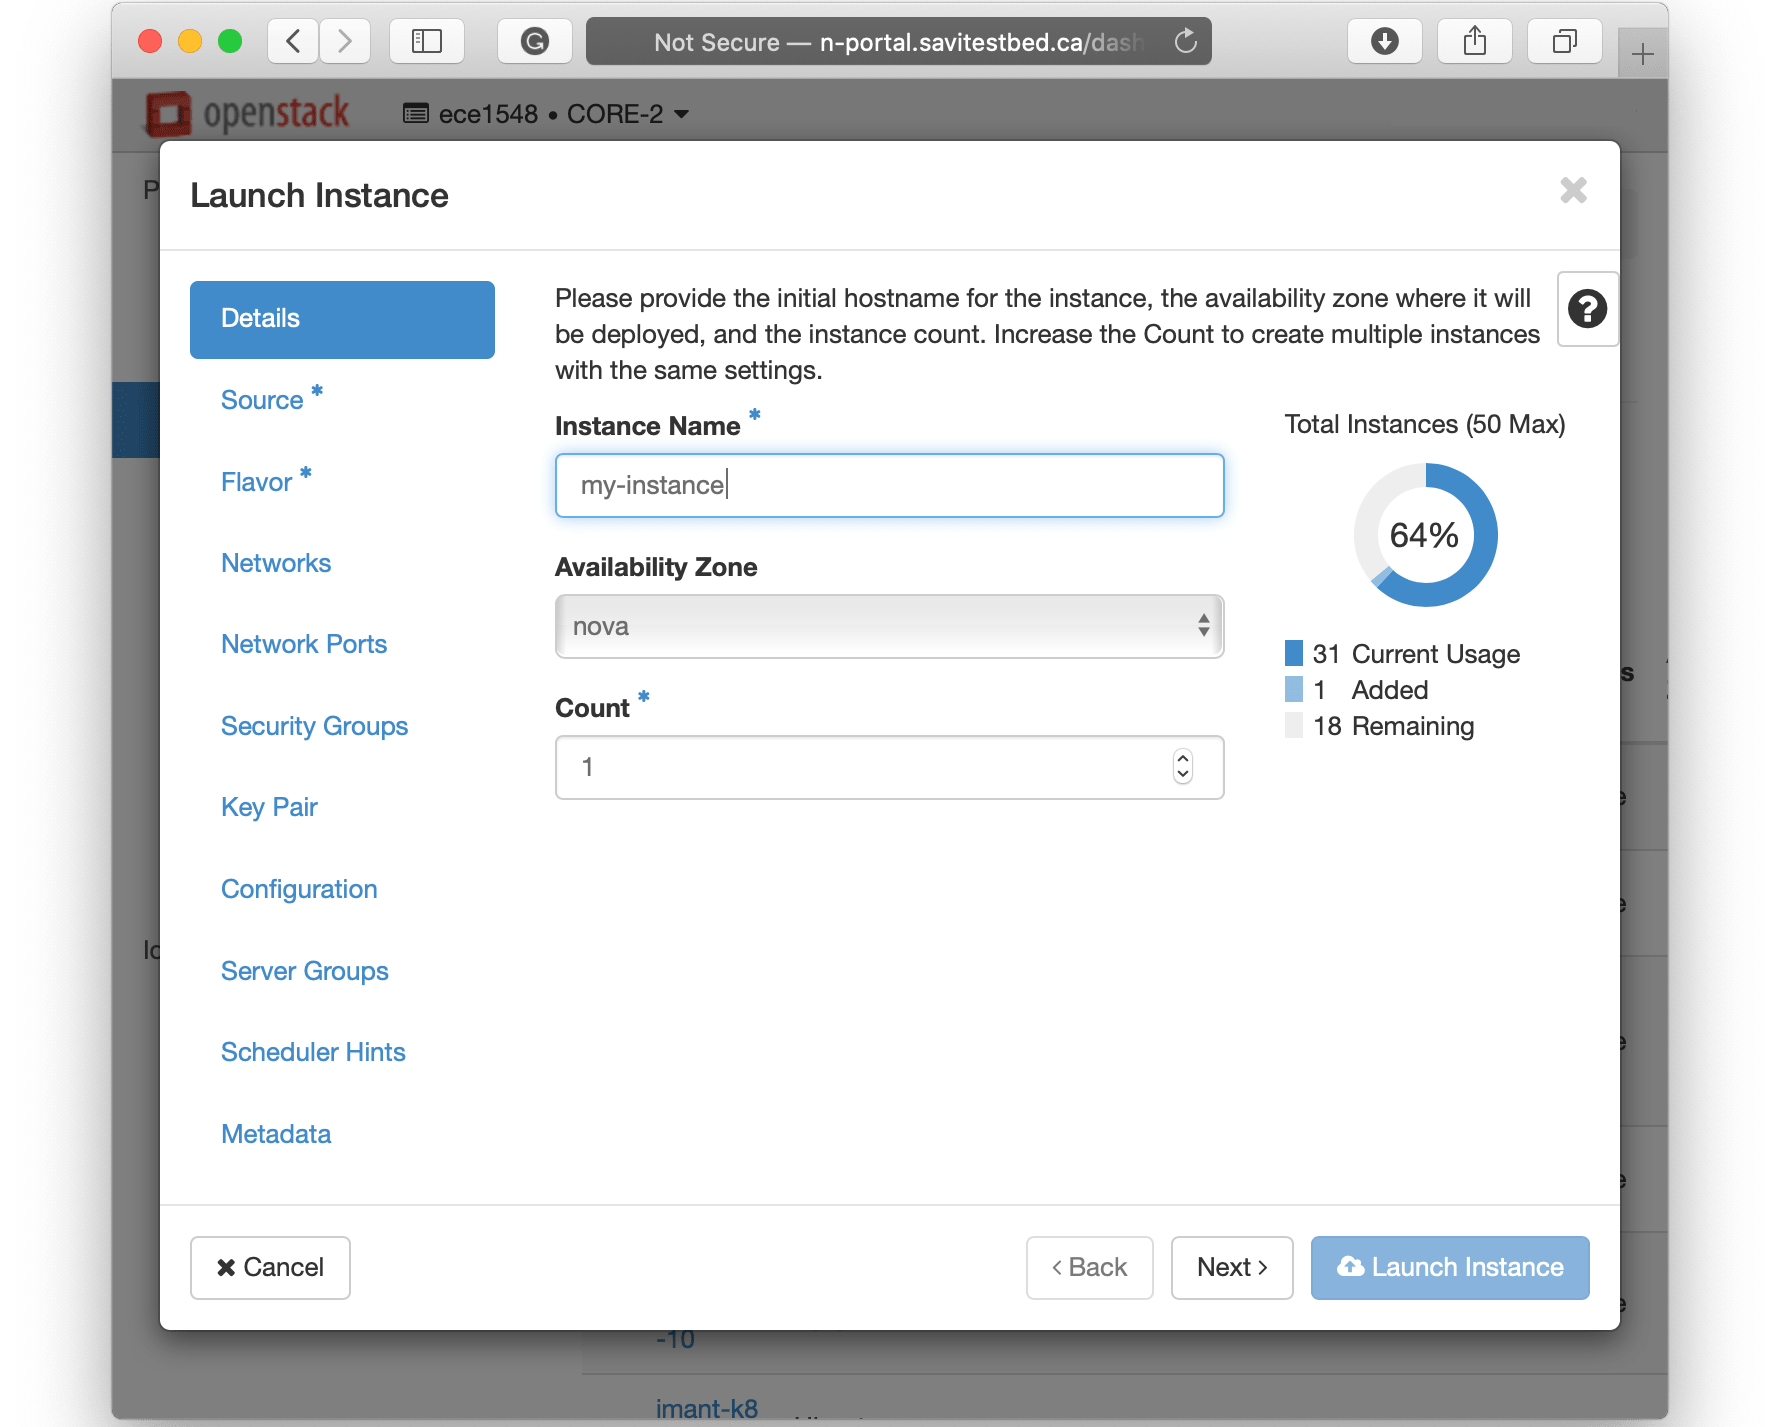
Instance Information
Enter a name and continue to the next step.
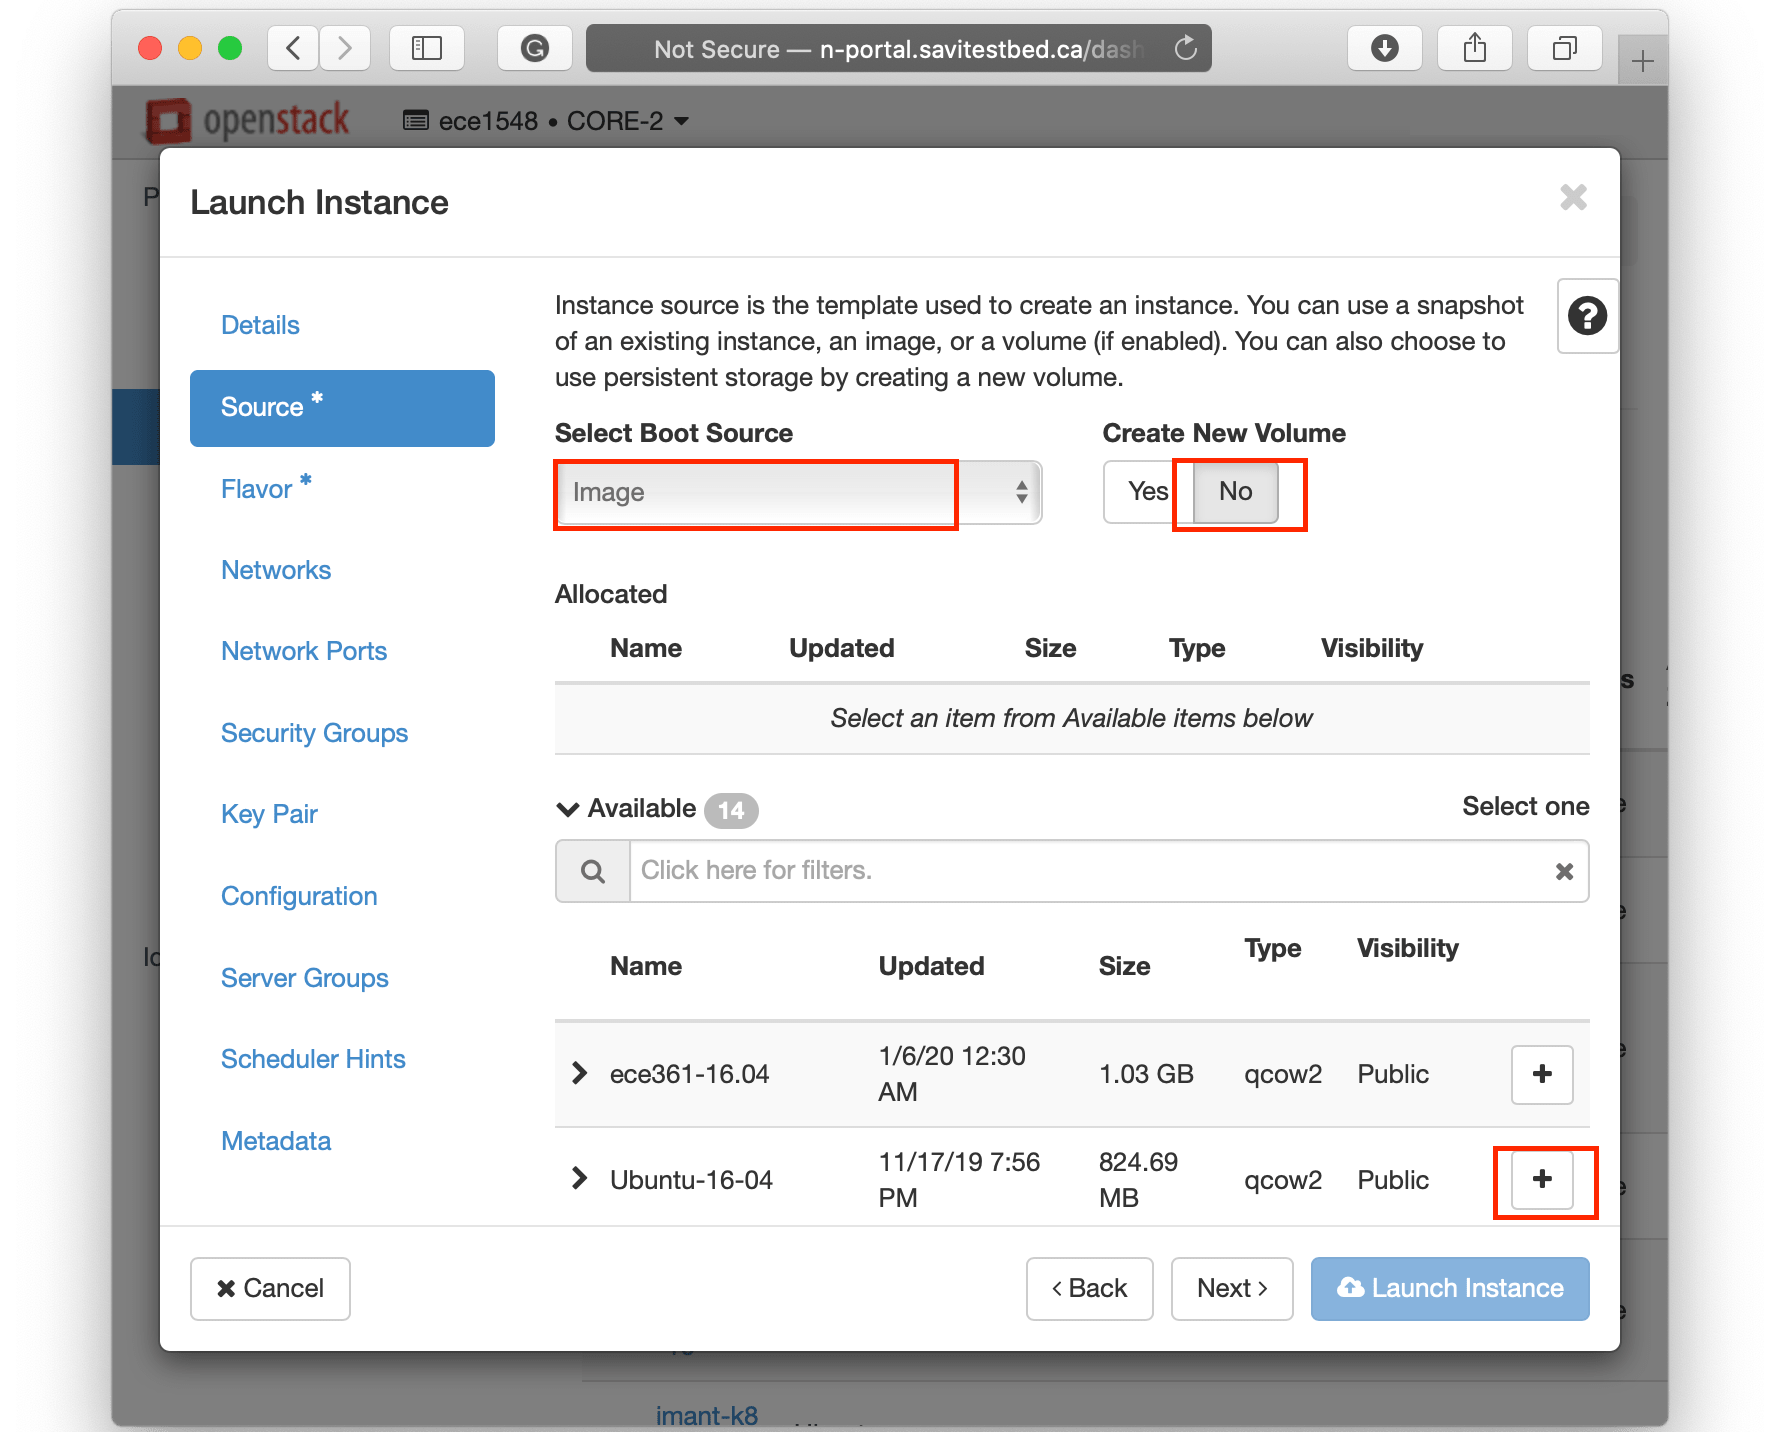
Source Image
In the Source menu, make sure you have selected image as the boot source and not create a new volume. Then select the appropriate image from the list.
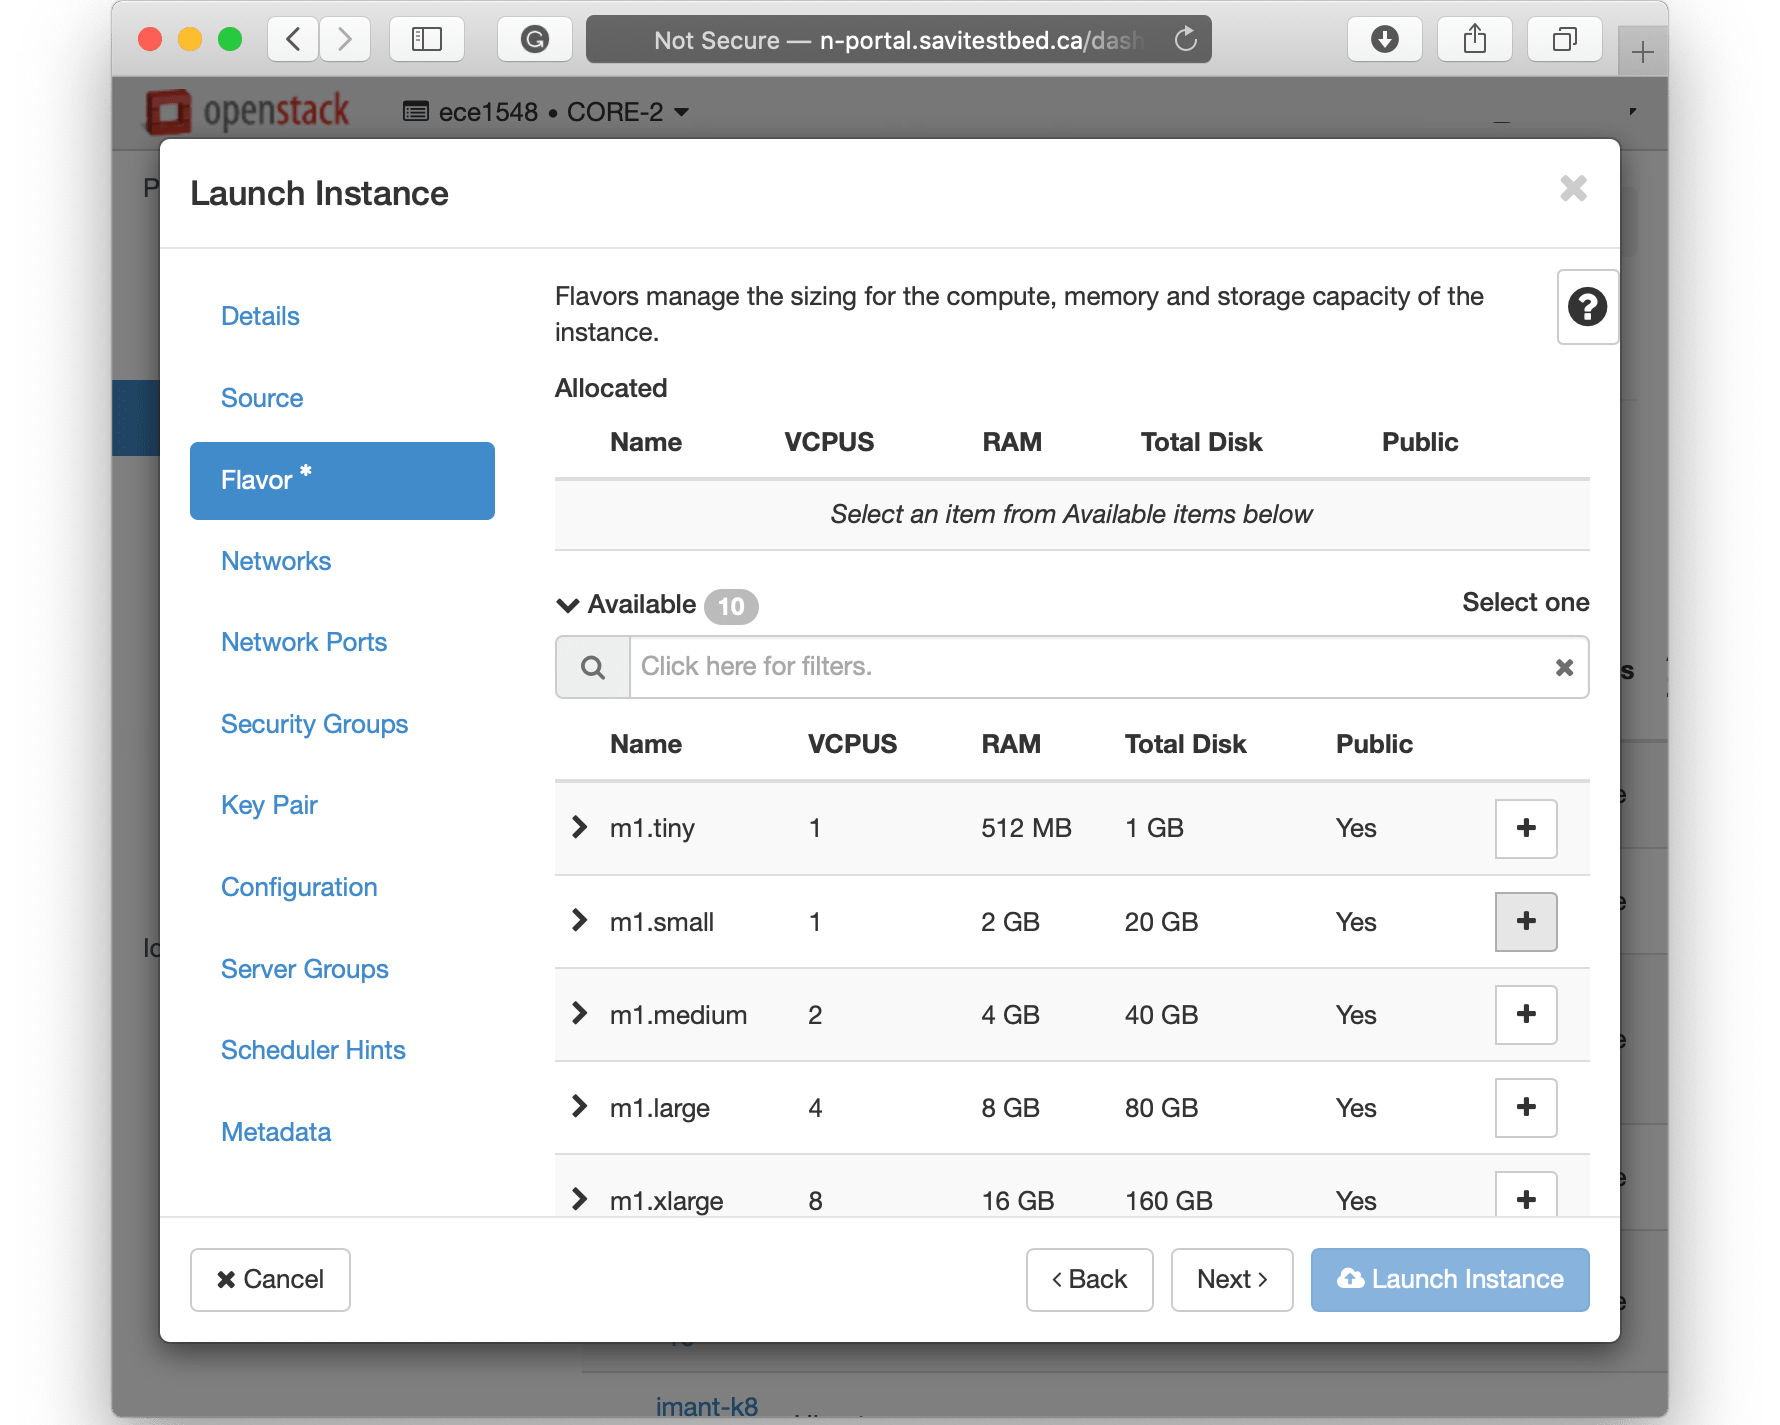
VM Flavor
A flavour determines the amount of resources given to your VM. Select the right flavour based on your needs and available capacity of the project. You can see the current status of the used resources in the Overview page.
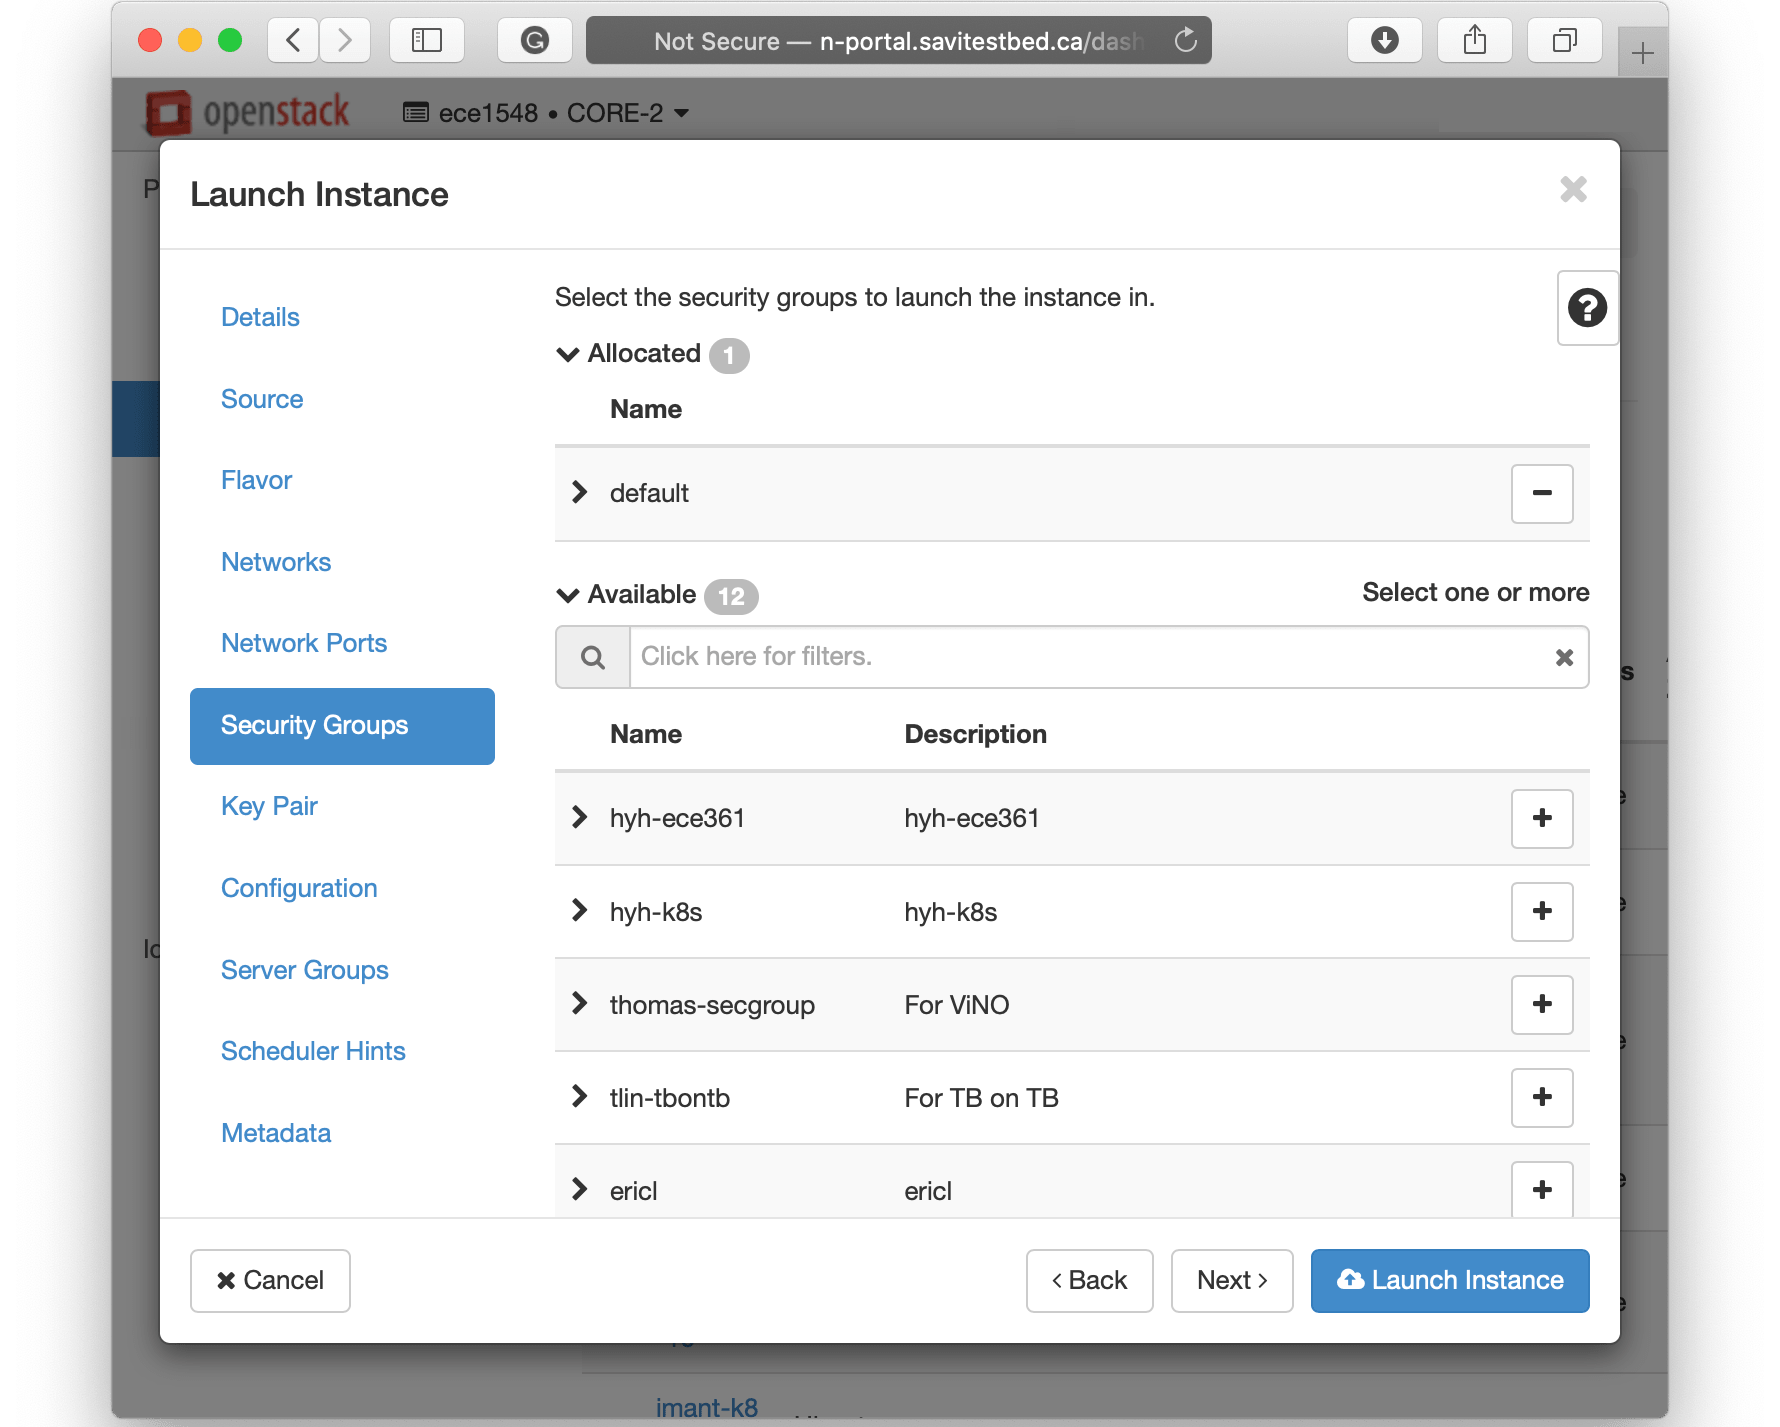
VM Security Groups
By default, there is limited access to your VM from outside (i.e. Internet). You have to create a security group that reflects the appropriate access (which port and protocol are open). You may select default security groups but if you need specific ports to be opened, you have to create your security group.
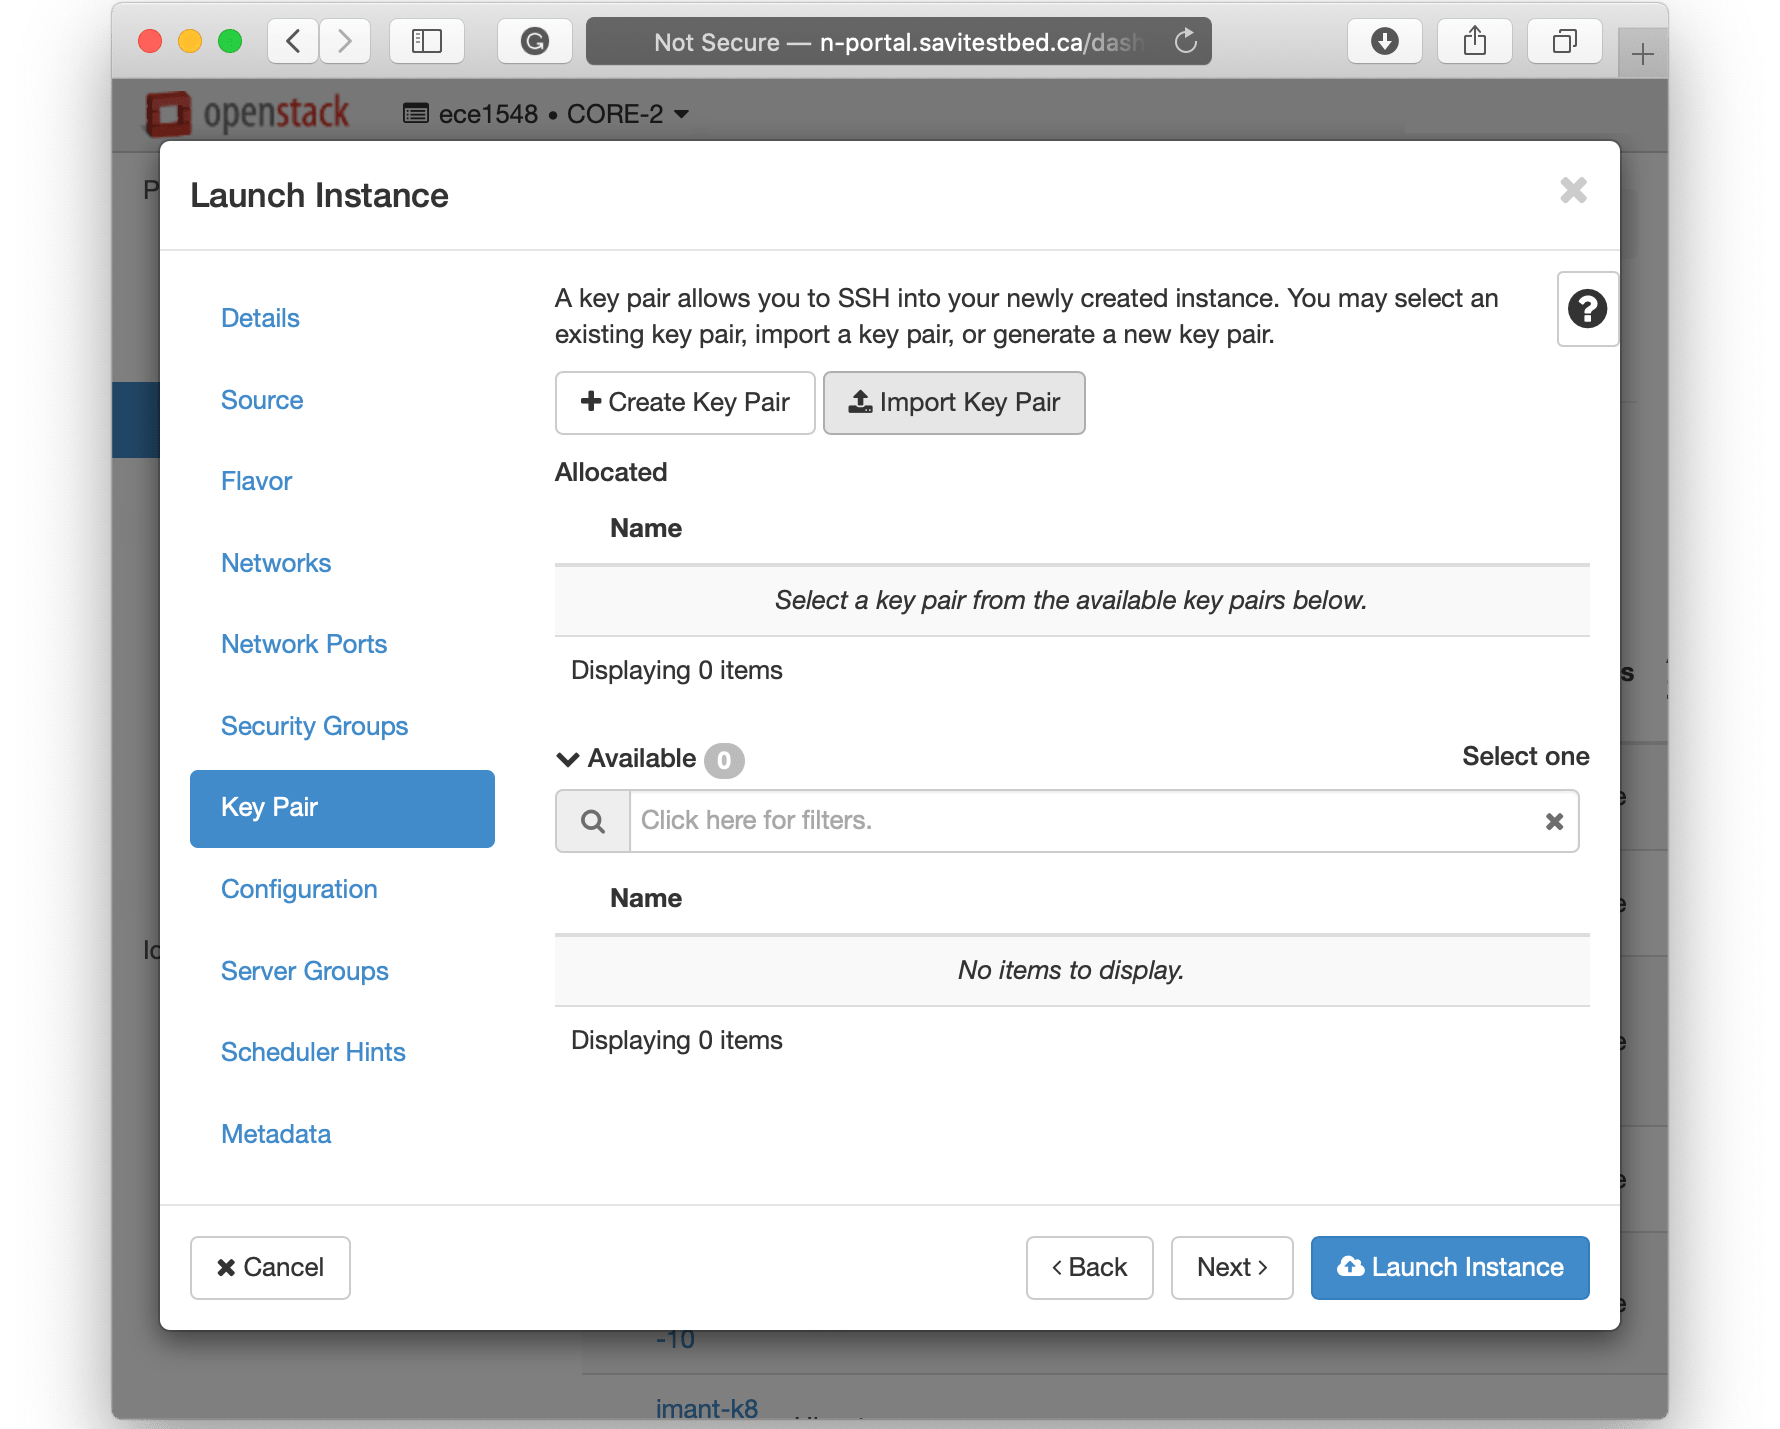
VM Key Pair
Access to VMs using username and passwords is blocked when you first create a VM. You can change this later within the VM’s configuration. To enable access to it for the first time, you have to provide a public SSH key. If you do not have one already, you can create one at this page.
Now click on Launch Instance and your VM should boot and may take time for some seconds or minutes based on the image you have selected. Once your VM is booted, you can click on it and then using the tab console access to the VM. Please note it is always preferred to use the client1 machine as the gateway.
Want to read more?
Check out these pages:- Kubebuilder Admission Webhook for Core Types
- Kubernetes Object Configuration with Kustomize
- A Guide to CA, CSR, CRT, and Keys (Digital Certificates)
- Deploy a Local Kubernetes Webhook Server
- Linux iptables Reference Guide with Examples
- Configuring sFlow on Dell Switch with OS9
- Configuring WebDAV Access for Zotero on Ubuntu
- Dell Switch Configuration Commands
- Route Traffic through a Private Network using Dynamic Port Forwarding and Proxy SwitchyOmega
- Access to the SAVI using CLI
- Connect to Existing Running Desktop Session using x11vnc
- Install Ubuntu 20.04 via PXE UEFI Setup
- Run PyCharm IDE over SSH using Remote Host Interpreter
- Reverse SSH to Access Hosts Behind the NAT
- VNC Server in Ubuntu 16.04, 18.04 and CentOS 7
- Create an Overlay Network in Ubuntu using Open vSwitch (OVS)